Install Core Node on Linux VPS

1 - Setup a VPS Server
::info There are many cloud services available to setup a Virtual Private Server (VPS). Microsoft Azure, Google Cloud Platform (GCP), Amazon Web Services (AWS) and Alibaba Cloud are few examples of where you can acquire a VPS. :::
If you have not already, check out one of the Set up Linux VPS on how to set up a Linux VPS at Amazon Web Services (AWS), Vultr, Google Cloud Platform (GCP), Digital Ocean or Contabo.
2 - Login to your VPS
You can either open the console within Vultr or use any SSH (secure shell) software to connect to the VPS. If you’re using Windows, we recommend PuTTY.
2.1.1 - For Mac & Linux
Both ssh and sftp already come with the system to login and securely transfer files respectively. Open a Terminal and run this command:
ssh user@[server ip address]
Example:
ssh root@144.202.73.194
2.1.2 - For Windows
In Putty, enter your server’s IP address, make sure SSH and Port 22 are selected and then click on Open.
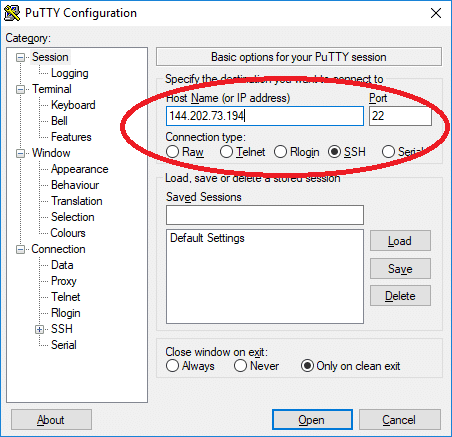
2.2 - You may get a security alert about the server’s rsa2 key fingerprint. Just click Yes to trust the server and connect via SSH.

2.3 - You will be prompted to enter your username and password. See the informations on your Vultr dashboard.
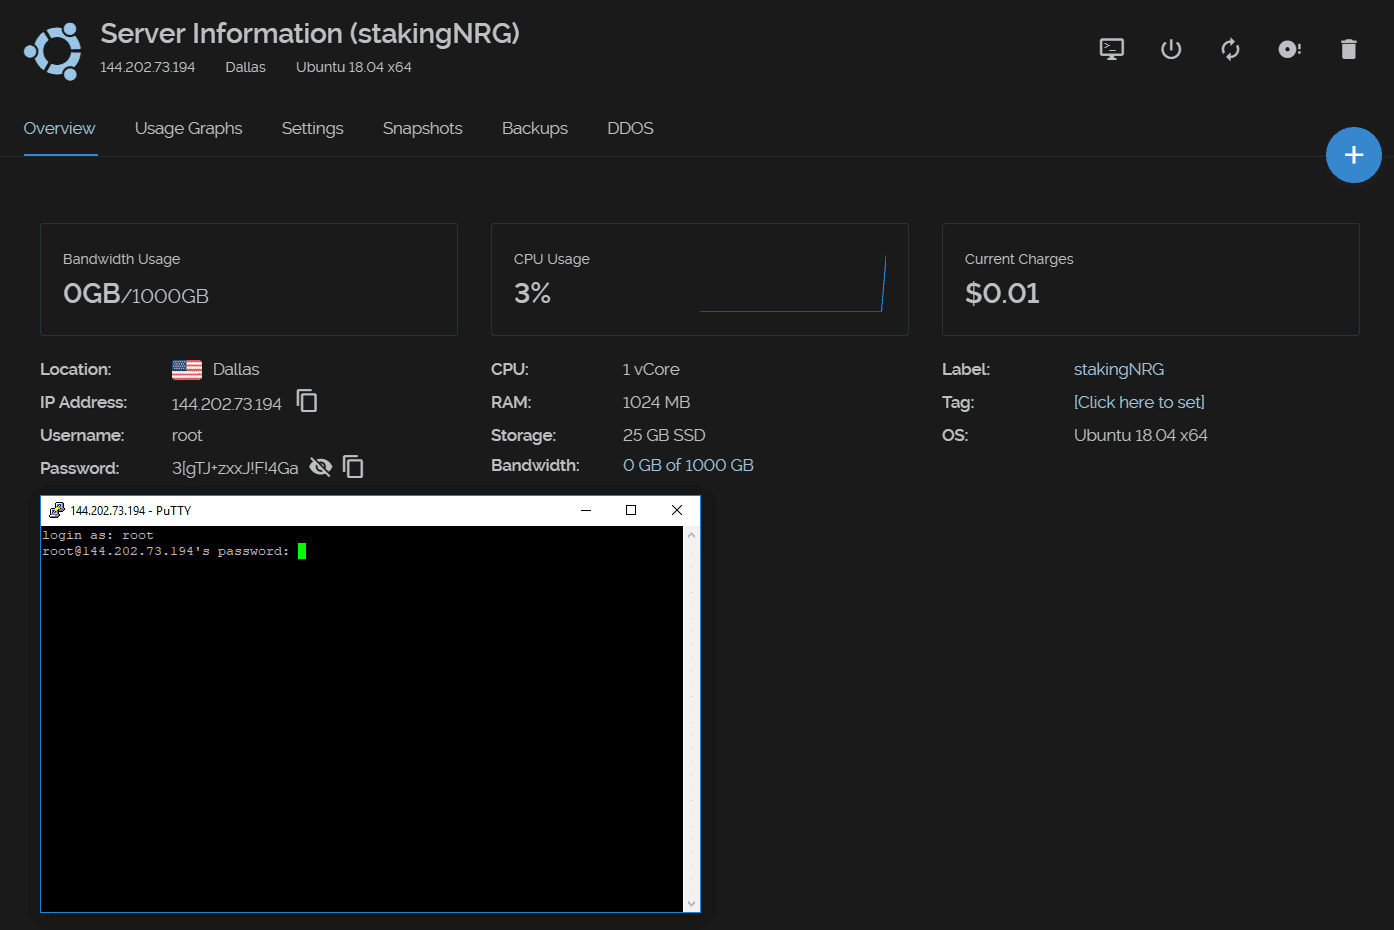
You are now connected to your VPS!
2.4 - We HIGHLY recommend you to change your password by running the command:
passwd

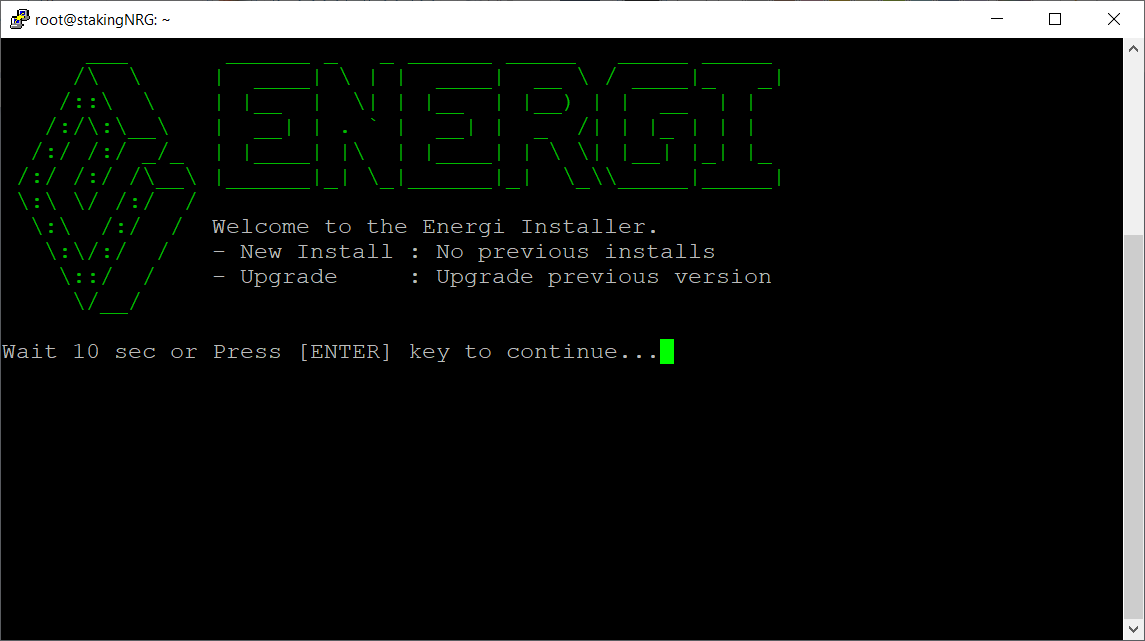
3 - Installation
Before starting the installation, make sure you are logged in as the root user, else the installation will fail. If during your VPS creation you had to create a standard user to access the Linux system (such as ubuntu or an username of your choice), make sure to switch to the root user first by issuing the following command: sudo su -.
3.1 - Once you are logged as root into the VPS, run the command below to start the installation or upgrade on Energi Core Node:
sudo bash -ic "$(wget -4qO- -o- raw.githubusercontent.com/energicryptocurrency/energi3-provisioning/master/scripts/linux/energi-linux-installer.sh)" ; source ~/.bashrc

This command can also be used to upgrade your Core Node if a newer version is available.
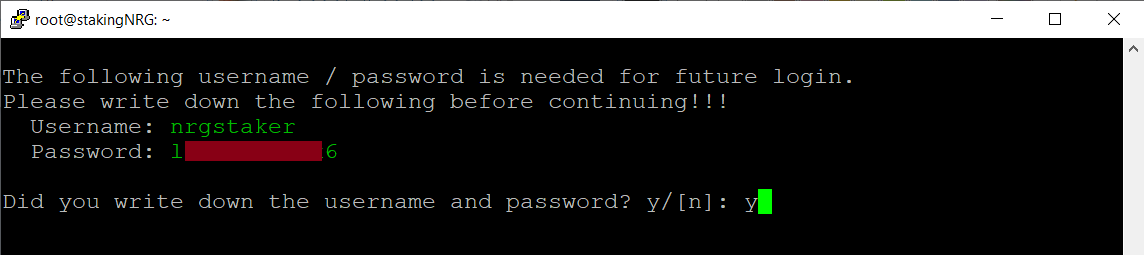
3.2 - You will be given a username and password to log into the VPS. They will be similar to what is shown below. Note down the information and then type y and ENTER to continue.
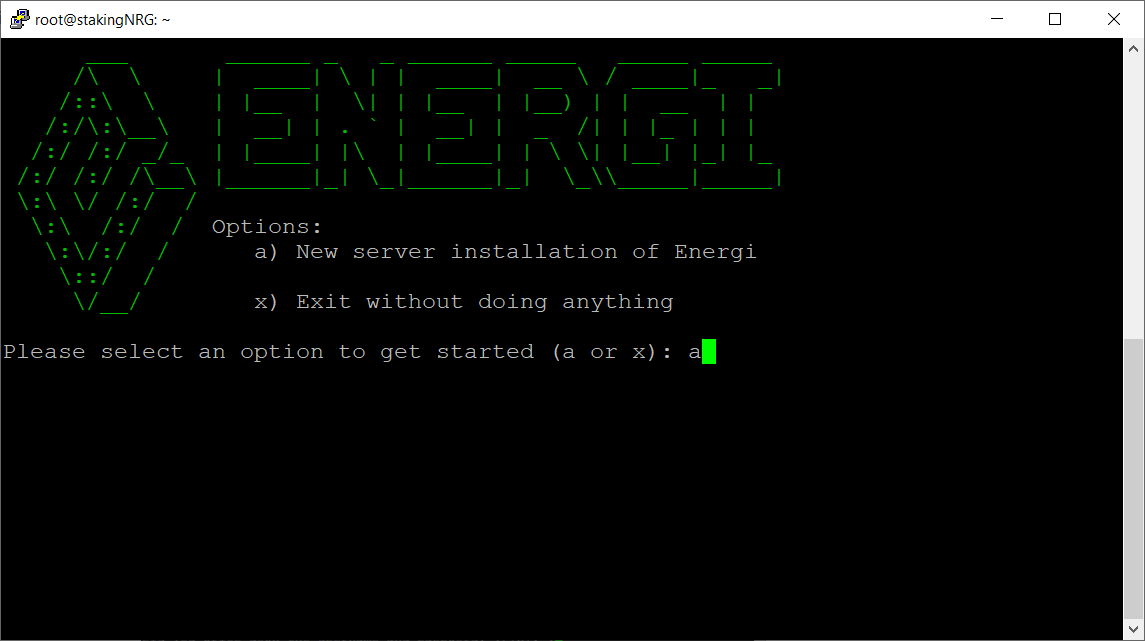
3.3 - Type a and press ENTER for a new installation.
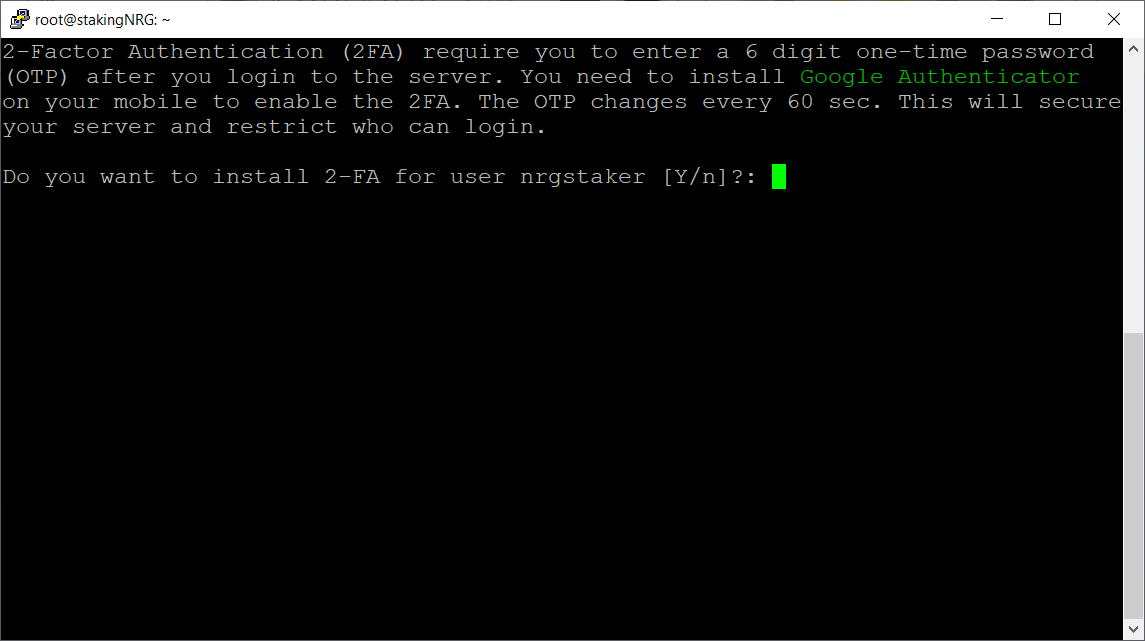
3.4 - You will then be prompted with the 2-Factor Authentication (2FA) option. We HIGHLY recommend you use it, as it adds an additional security layer to your VPS.
Type y and press ENTER.
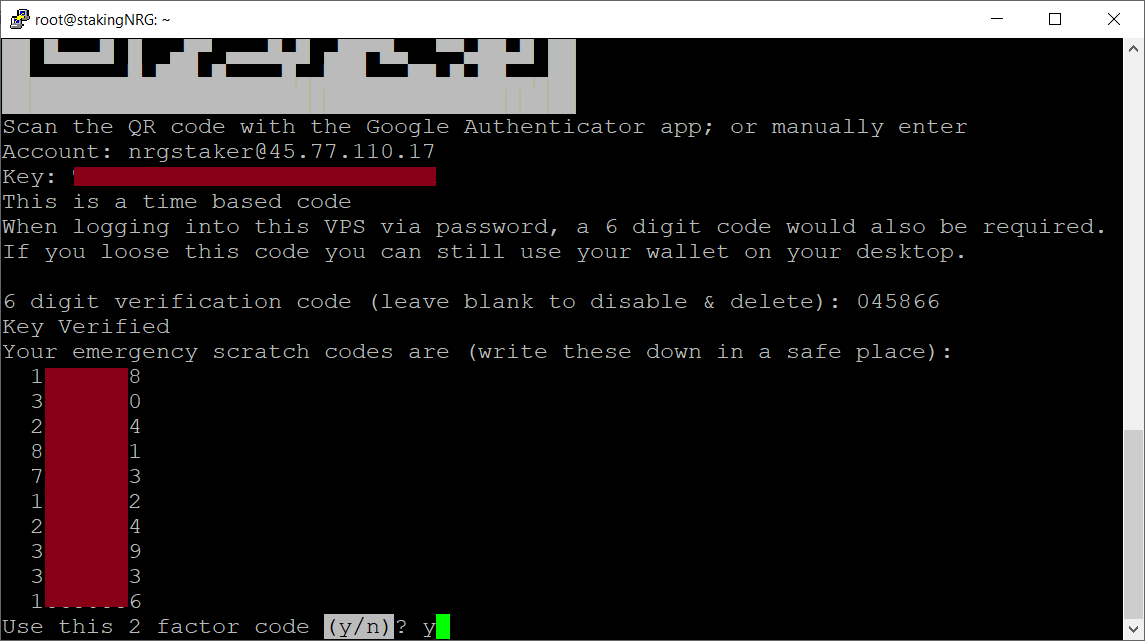
3.5 - Scan the QR code using the Google Authenticator App. Type the 6-digit code to continue.
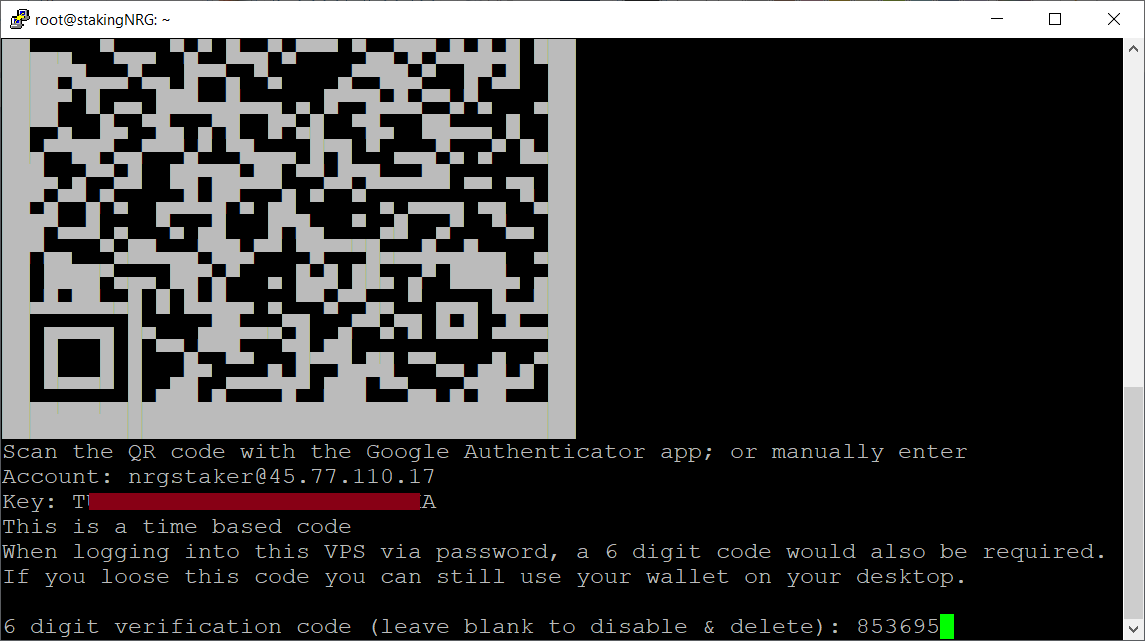
3.6 - Write down your emergency codes and store them in a safe place. The emergency codes can be used in case you do not have access to your mobile device.
Type y and press ENTER once you are ready.
The installation script will download and begin installing Energi Core Node. Once it finishes, it will ask you to import your wallet file.
4. Import your wallet file
In this section, we will import the wallet previously created in MyEnergiWallet.
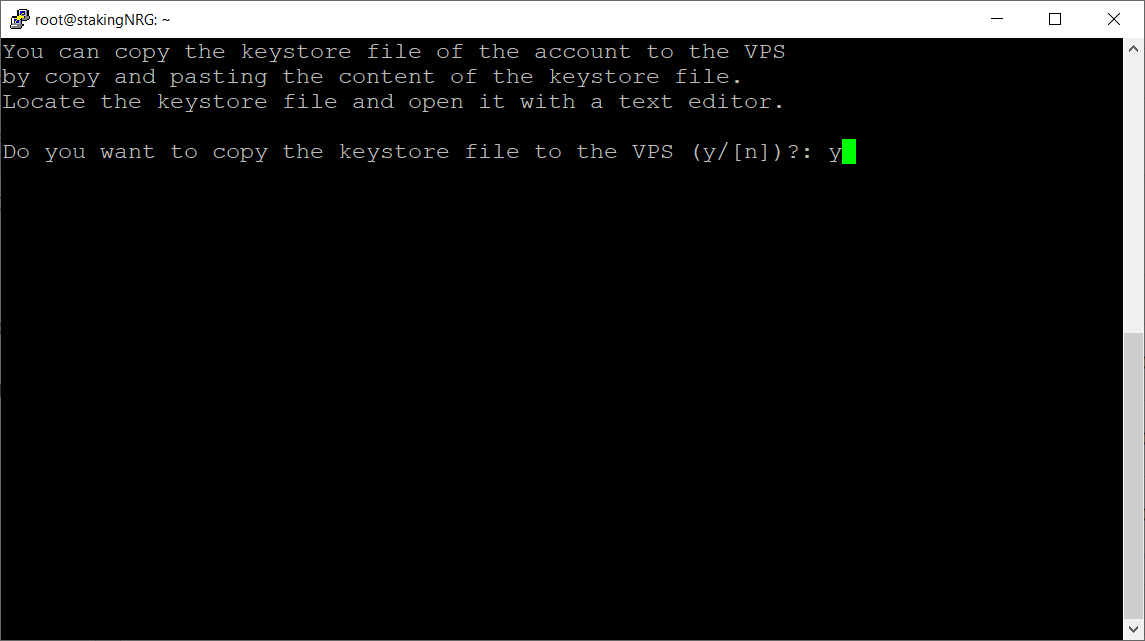
4.1 - On your computer, find the keystore account file. It normally starts with UTC. Using a text editor, open the file. Copy the contents of the file.
4.2 - In the VPS, type y and then ENTER to import the keystore file.
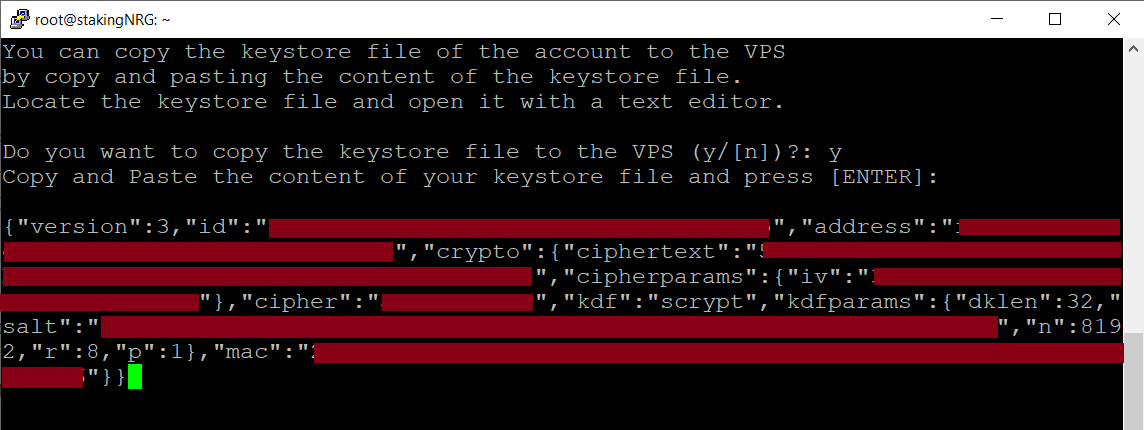
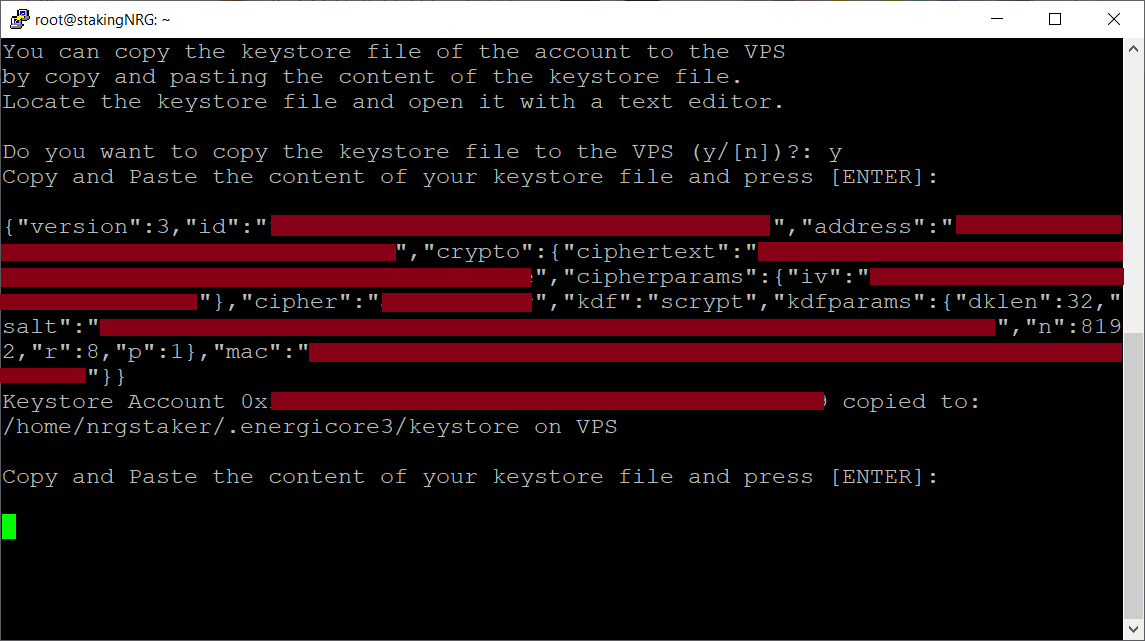
4.3 - Paste the contents of the keystore file.
4.4 - Press ENTER to confirm, and then ENTER once again. It will create the keystore file in the VPS and proceed with the installation.
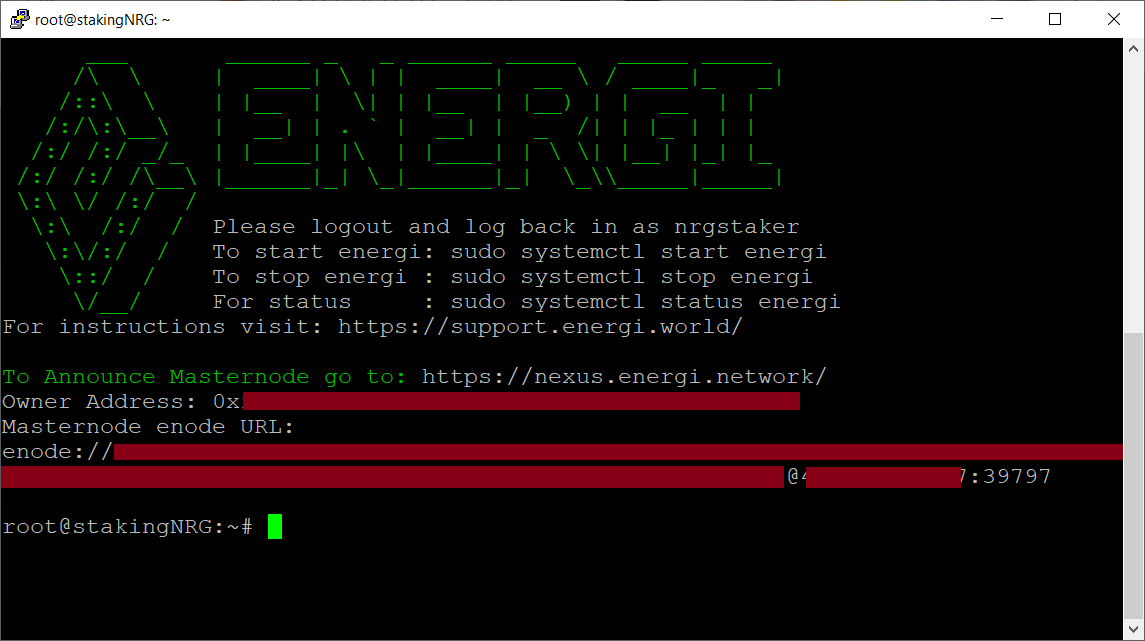
Congratulations! You have successfully installed Energi Core Node on your VPS and it will start synchronizing with the blockchain!
You can follow the synchronization progress by using the nrg.syncing command after attaching to your Core Node console. Keep in mind that for new installations, it can take an average of 48 hours to completely synchronize your node to the latest block.
5. Useful commands
Energi Core Node will automatically start, even after a VPS reboot.
5.1 - The script will provide you the enode information of your Core Node. You will need this information to set up your Masternode. We recommend you copy the enode information into a text editor.
5.2 - Here are some useful commands for your VPS :
5.2.1 - Status checking
systemctl status energi3
CTRL + C to exit the status.
5.2.2 - Manual start
systemctl start energi3
5.2.3 - Manual stop
systemctl stop energi3
5.3 - You are still connected as root. Type exit to log out and close the terminal session.
5.4 - Log back into the VPS. This time login as nrgstaker.
5.5 - Accessing the Core Node
- Run the following command to enter the console :
energi3 attach
- Make sure that you are running on the latest version. Our latest version can be found here

- Check if your wallet was properly imported by running:
personal.listAccounts

- Exit Energi Core Node by running the following command :
exit
Congratulations! You are now all set!
Next Step - Staking & Masternode
Now that you are all set with Energi Core Node, you can either follow the Staking or the Masternode Guide :
Need help?
- Get technical assistance :
Help me! Get technical assistance by the Energi team