Masternode Guide
1 - Requirements
- You need to create a MyEnergiWallet for Masternode-related operations:
- You need to have Energi Core Node installed & running 24/7 for your Masternode:
We HIGHLY recommend to run Energi Core Node on a VPS, as your machine's IP will be displayed publicly in our Masternodes list.
In order to run a Masternode you need to have at least 1001 NRG: 1000 NRG which will be allocated as the Masternode Collateral; 1 NRG which will be partially used to cover the transaction fees required to deposit collateral and announce the Masternode. You can add in multiples of 1000 NRG to a maximum of 100000 NRG, at which point it will be needed to deploy another Masternode for any additional collateral.
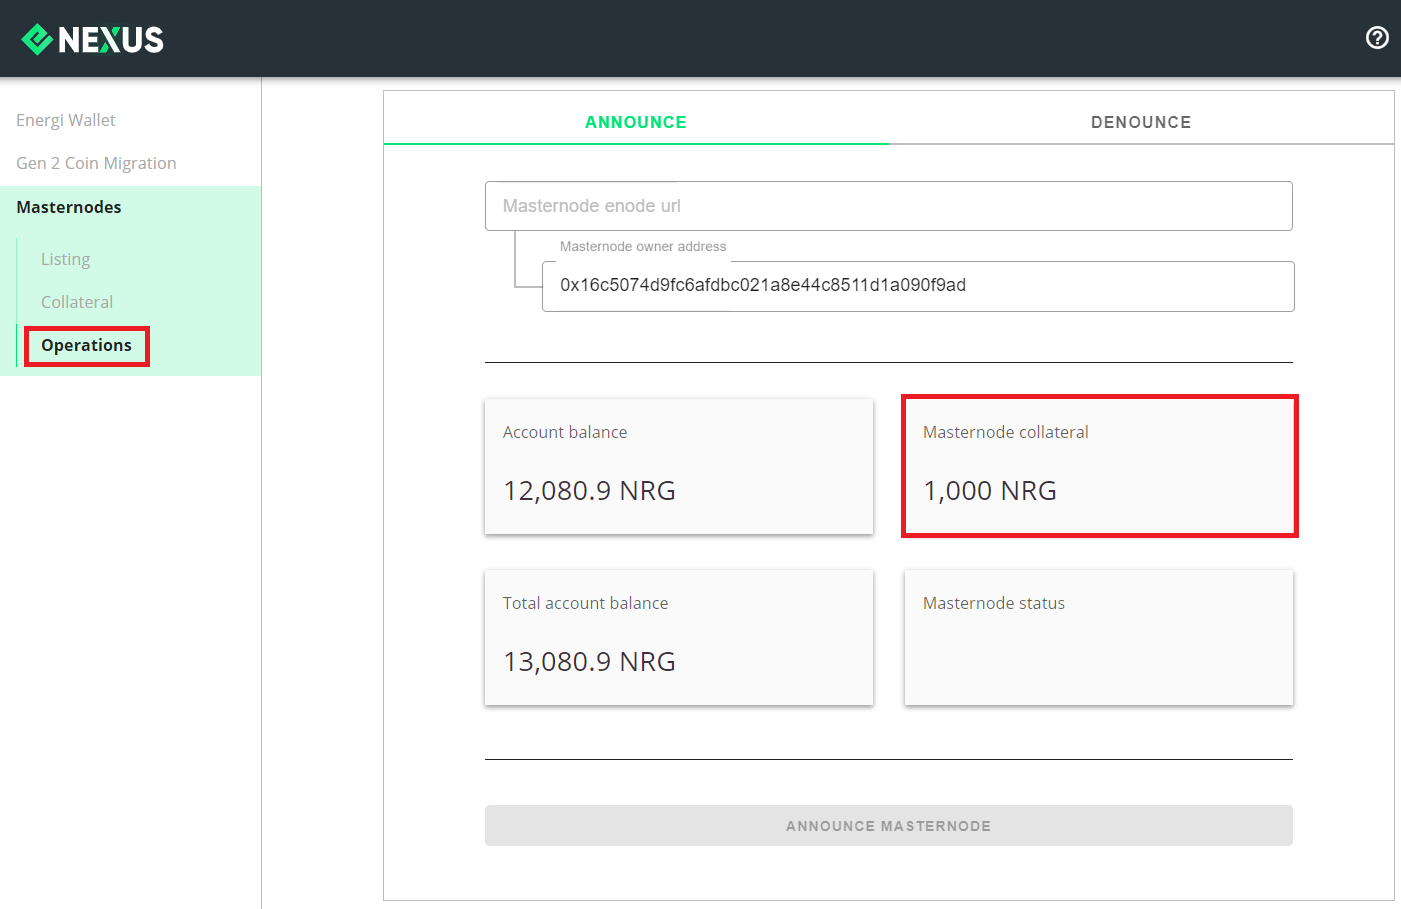
2 - Deposit Collateral
2.1 - Head over to Energi Nexus:
Select the Masternodes section in Nexus. As soon as you enter your wallet address, it will show information.
2.2 - Once you've entered your address, click on Deposit Collateral.

2.3 - Now select the amount of NRG you want to put as collateral, and confirm by clicking on Deposit Collateral.
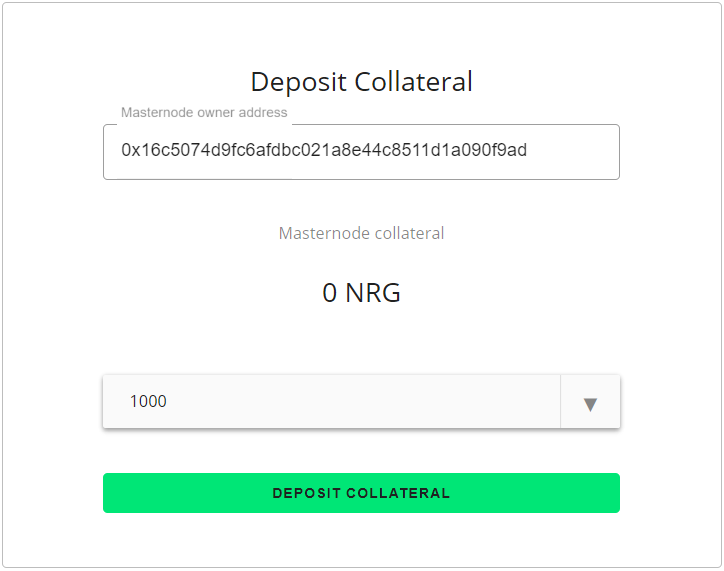
1,000 NRG is the new minimum collateral.
You are able to increment the collateral when you want, up to 100,000 NRG per instance.
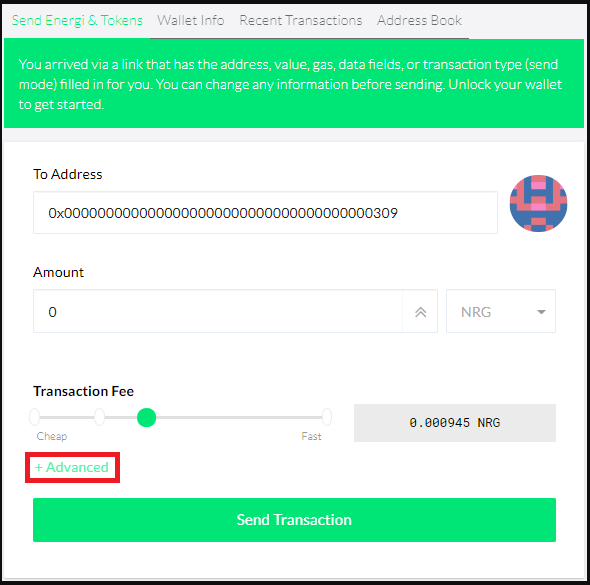
2.4 - You will be redirected to MyEnergiWallet. Once you've accessed your wallet, you will be prompted with a transaction. Verify the amount and click on the Advanced button. You MUST click on the Advanced button for the Data field to be populated, else your transaction will fail.
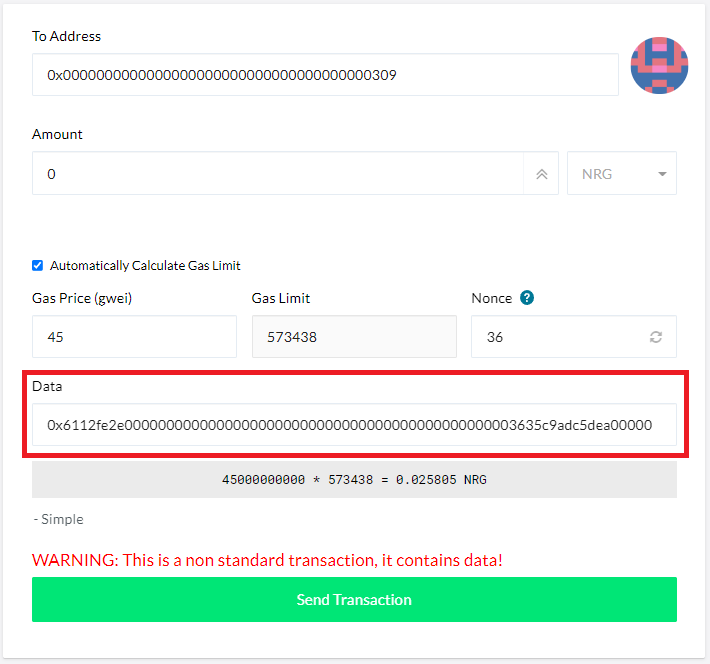
2.5 - Once you click the Advanced button, you should see the Data field populated like the image below (the actual content might vary):
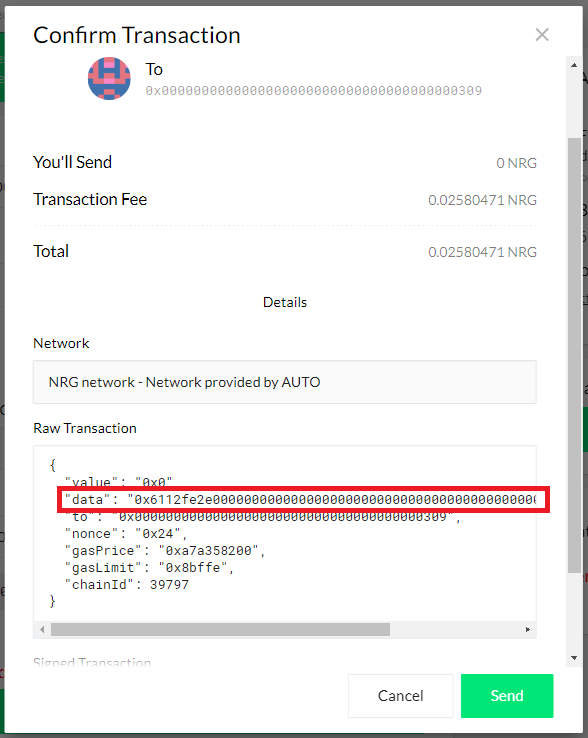
2.6 - Click the Send Transaction button. Another popup will appear with the Transaction Details. Click the Details button and you should see the information for the Data the same as before. After confirming, click Send and wait for your transaction to be settled.
2.7 - Head over to our Blockchain Explorer to confirm the transaction by clicking on Verify:

2.8 - Confirm that the Transaction is Successful and that there is at least one Block Confirmations:

2.9 - If we go back to Nexus, we can now see that the collateral transfer was successful!
You just successfully deposited the collateral!
Now, you need to announce your Masternode.
3 - Announcing the Masternode
**We're using Energi Core Node to run the Masternode 24/7.
We HIGHLY recommend to have it installed on a VPS.**
3.1 - Start Energi Core Node :
energi3 attach
3.2 - Next, run the following command to get your enode information:
admin.nodeInfo.enode
This will return your Masternode enode URL. You will need enode information to announce your Masternode.

Make sure that the IP (blank zone above) is different from 127.0.0.1
If you see this IP, replace it by your VPS IP or head over a service like Ipify.
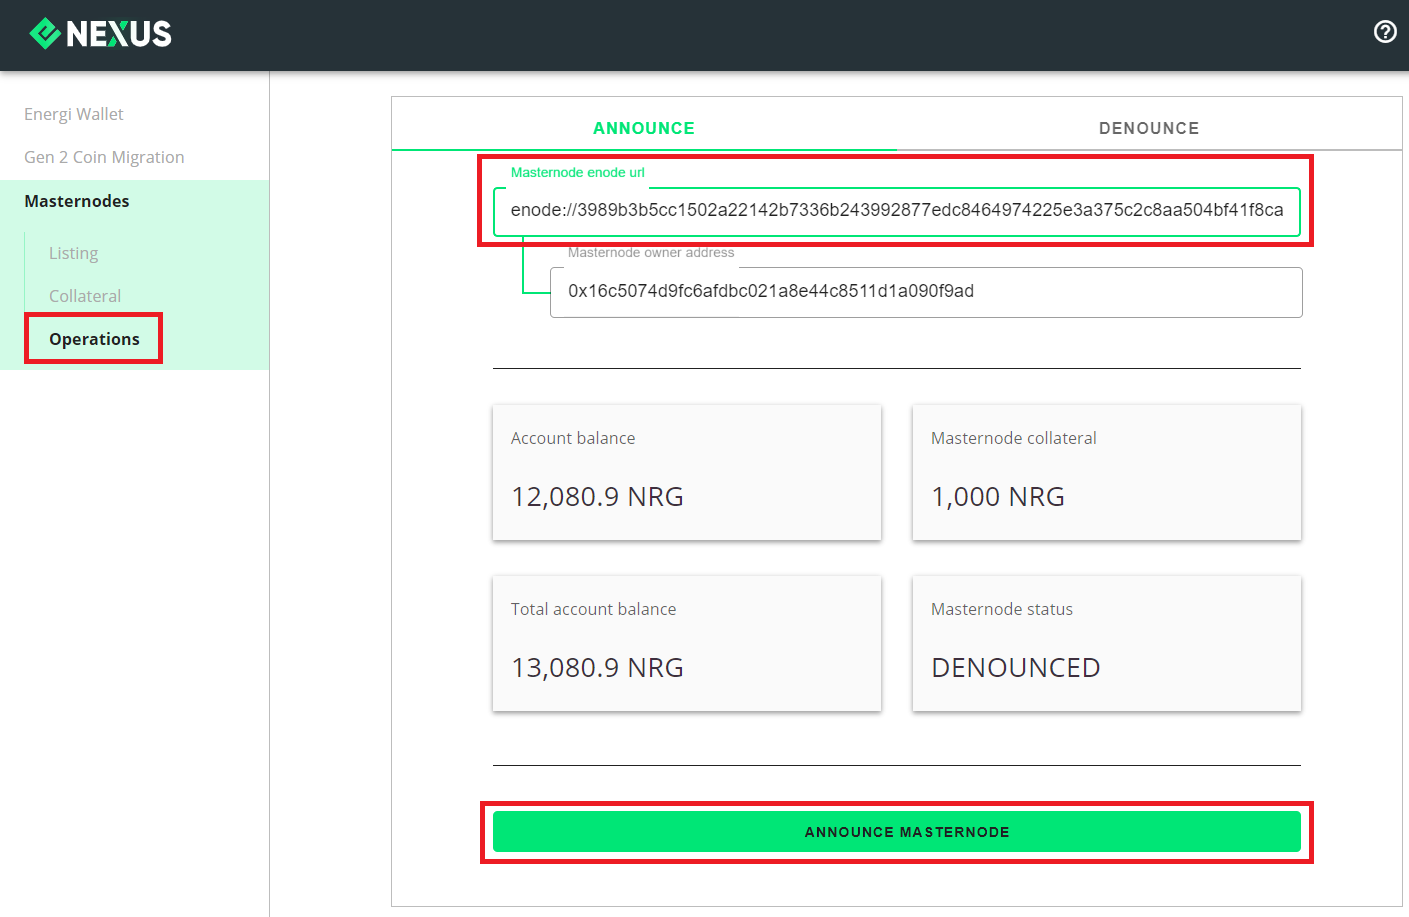
3.3 - Go back to Nexus, and paste it in the Masternode enode URL field.
Verify the informations, then click Announce Masternode.
3.4 - Again, you will be redirected to MyEnergiWallet to confirm the transaction. Once you are logged in, click on the Advanced button. You MUST click on the Advanced button for the Data field to be populated, else your transaction will fail.
3.5 - Once you click the Advanced button, you should see the Data field populated like the image below (the actual content might vary):
3.6 - Click the Send Transaction button. Another popup will appear with the Transaction Details. Click the Details button and you should see the information for the Data the same as before. After confirming, click Send and wait for your transaction to be settled.
3.7 - If you now go back to Nexus, you will see your masternode status updated to ACTIVE.
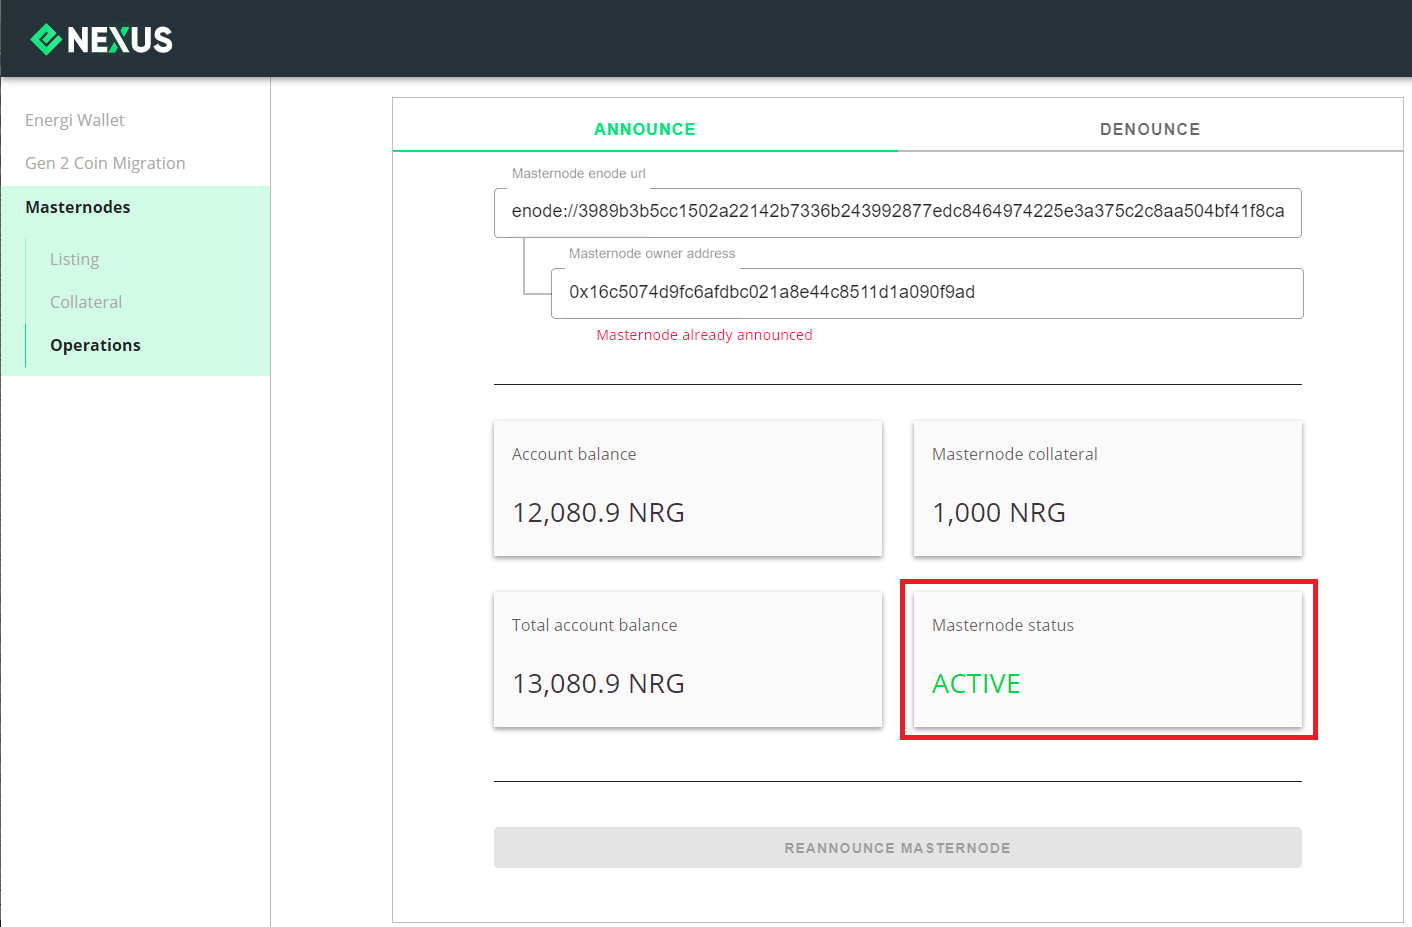
Take note that collateral deposit/withdrawal and the auto-compounding feature will re-announce your Masternode.
You just successfuly announced your Masternode!
Now, let's see how to check your rewards.
4 - Checking Your Rewards
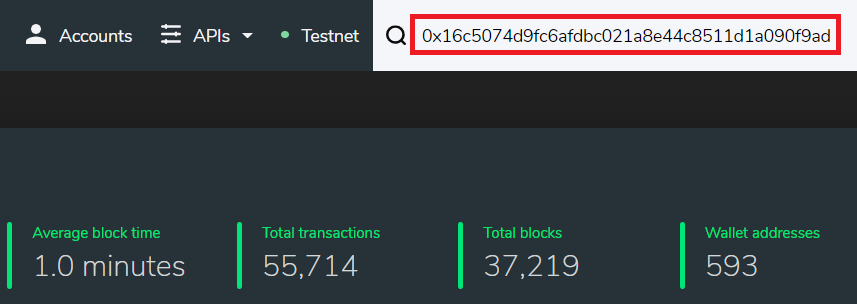
4.1 - Head over to Energi Block Explorer:
Energi Block Explorer View Blockchain data
4.2 - Enter your wallet address in the top-right corner and press ENTER
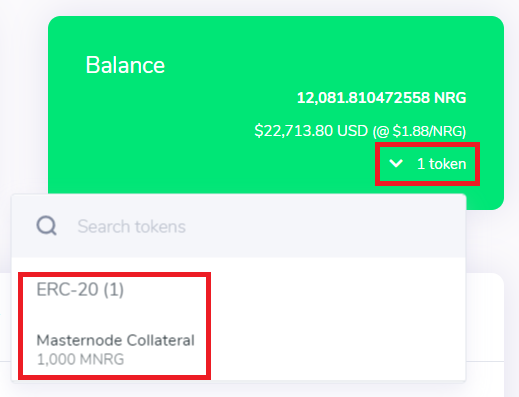
4.3 - Click on Tokens in the Balance box. It should match the amount of NRG you sent as Masternode Collateral.
4.4 - Select Internal Transactions. You will see your Masternode Rewards in real-time!
The first reward may take a few days to appear.

5 - Staking Your Rewards
Staking your Masternode rewards can be done in the same Energi Core Node instance.
5.1 - Head over our Staking Guide:
Staking Guide using Energi Core Node
Congratulations! You are now all set!
Need help?
- Head over our Masternode FAQ :
FAQ Masternode
- Get technical assistance :
Help me! Get technical assistance by the Energi team