Set up Masternode on Windows VPS at AWS
1. Create / Login to your AWS Account
1.1. Login via a web browser (Brave, Firefox, Chrome, etc.)
Navigate to https://aws.amazon.com/

1.1.1. If you do not have an AWS Account, click Create an AWS Account and continue the steps to create one.

1.1.2. If you already have an AWS Account, click My Account and then click AWS Management Console to log into your AWS account.
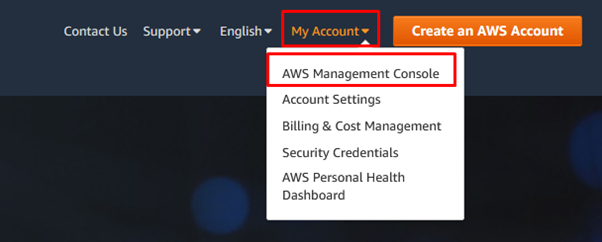
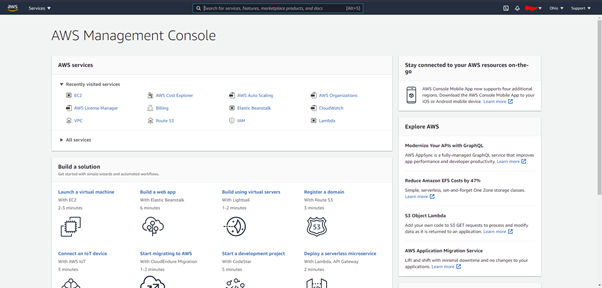
1.2. AWS Management Console
You will then be redirected to the AWS Management Console, which looks like this:
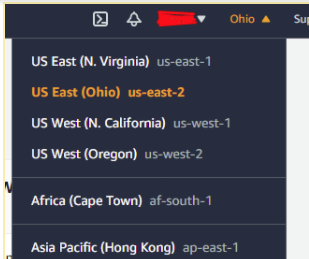
1.2.1. In the top right-hand corner, next to your name, you will find the location of your AWS Service. Click the location and choose a location closest to you. In our example below, we will use US East (Ohio) us-east-2
1.2.2. On the AWS Management Console page, click on EC2 under the All Services tab.

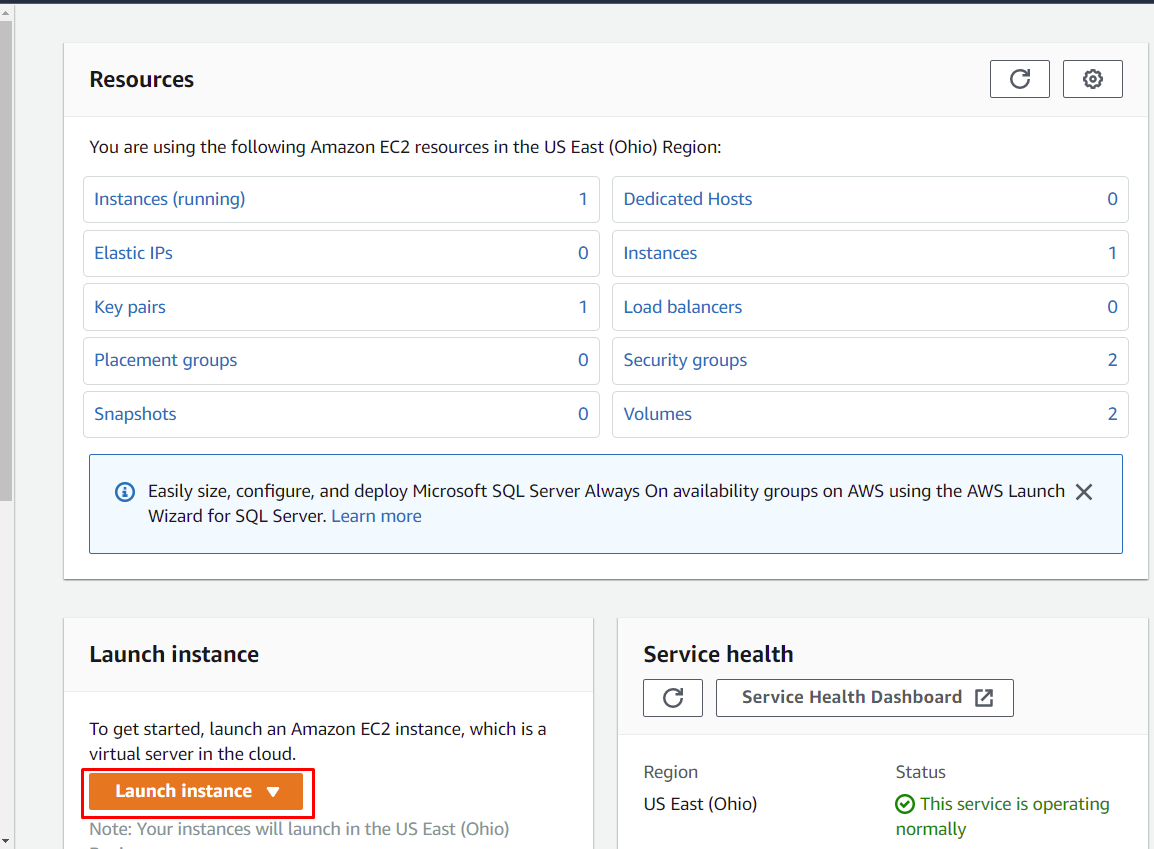
1.3. Navigate to the Resources page and click Launch Instance.
1.4. Choose an Amazon Machine Image (AMI).
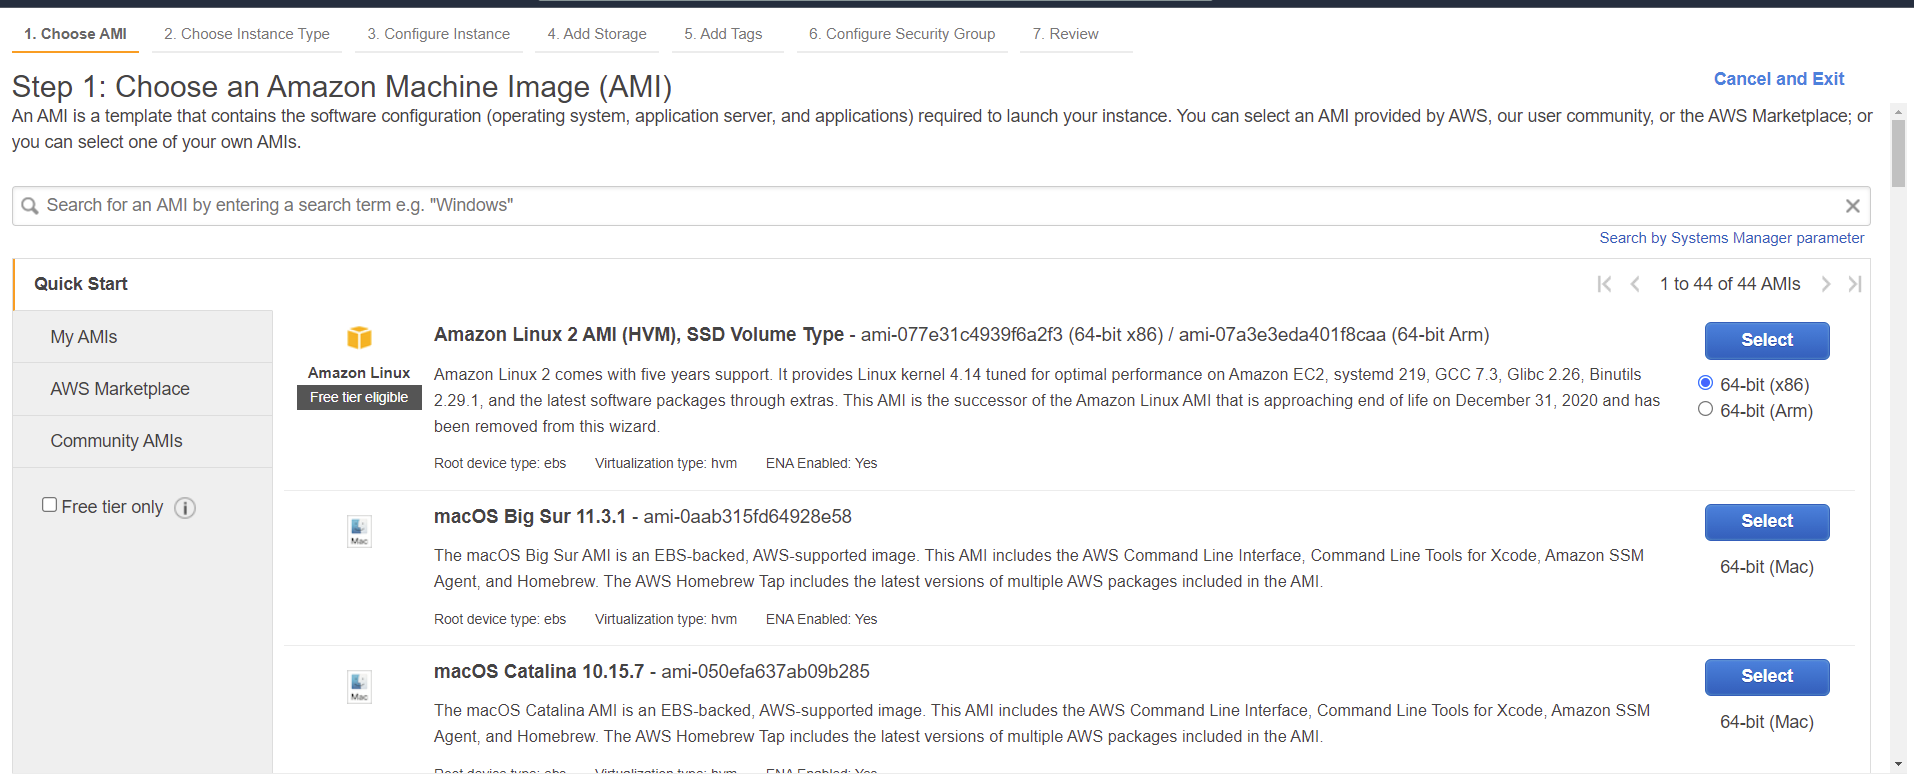
1.4.1. In the search bar, type Windows. You will find Microsoft Windows Server 2019 Base. On the right of this, click Select.

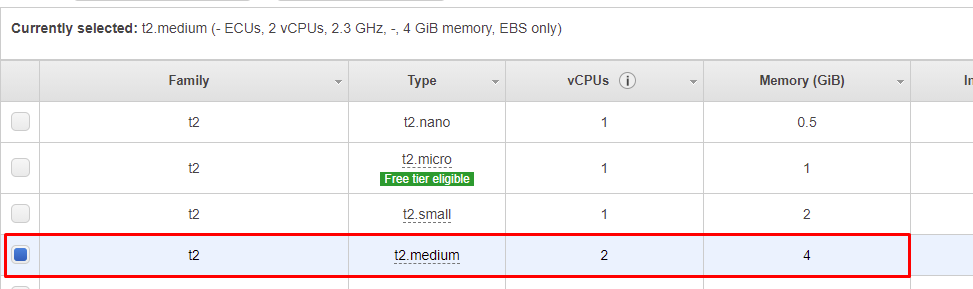
1.4.2. You will be sent to the next page — Step 2: Choose an Instance Type. Here, we choose t2.medium. This is recommended for Core Node. When chosen, on the bottom right corner of the page, click Next: Configure Instance Details.

1.4.3. You will then arrive at Step 3: Configure Instance. Here you can continue by clicking Next: Add Storage
Note: You can tick the box that says Unlimited for greater performance for this instance when it’s needed. You will be charged more. Read more here

1.4.4. You will then arrive at Step 4: Add Storage. Here we will add a second storage. Click Add New Volume.

1.4.5. After Clicking Add New Volume, ensure the Size of the second volume is 150 GiB minimum (recommended 200 GiB), the Volume type is General Purpose SSD, and Delete on Termination is ticked. Then, click Next: Add Tags.

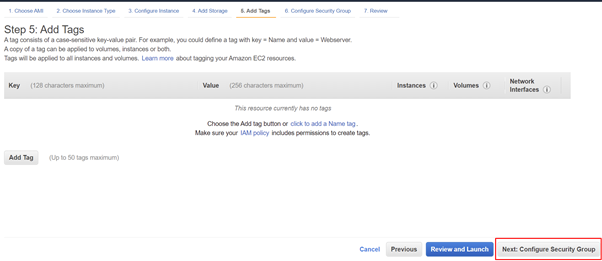
1.4.6. At Step 5: Add Tags, there is nothing to be done. Just click Next: Configure Security Group.
1.4.7. You will then be directed to Step 6: Configure Security Group. Here, we will set up the firewall rules for your VPS Instance.

1.4.7.1. If you already have a Security Group you would like to use, choose Select an existing security group. Choose the group and click Review and Launch.
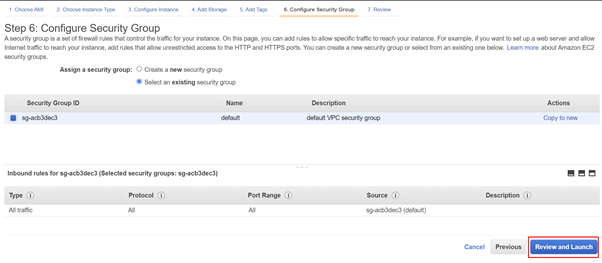
1.4.7.2. If you would like to create one, we recommend the following settings below. If your PC IP address changes frequently, it is recommended you change My IP to Anywhere. When completed, click Review and Launch


1.4.8. You are then shown the Select an existing key pair or create a new key pair pop-up. Here, you can choose an existing key pair, create a new key pair or proceed without one. For this guide, we prefer to Create a new key pair.
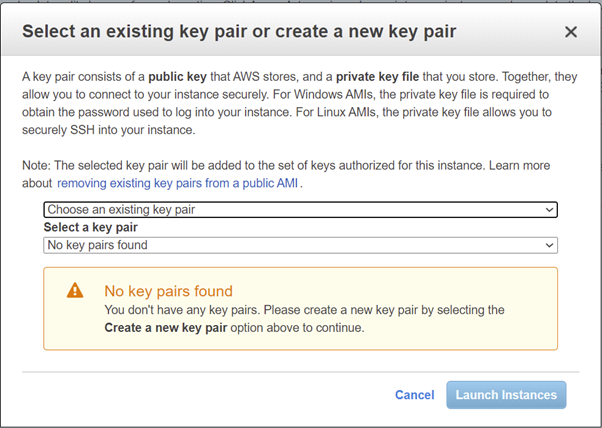

1.4.9. Give the Key Pair a name, and click Download Key Pair. Ensure you download the Key Pair and keep it in a safe place. When completed, press Launch Instances

Congratulations, you have successfully created a Windows VPS Instance on AWS.
2. Log into the Windows VPS Instance on AWS
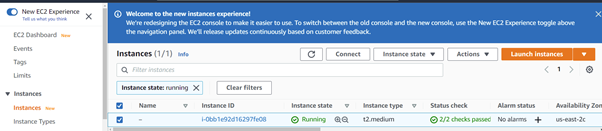
2.1. Click on the Instance ID. The example below shows an ID i-0bb1e92d16297fe08.

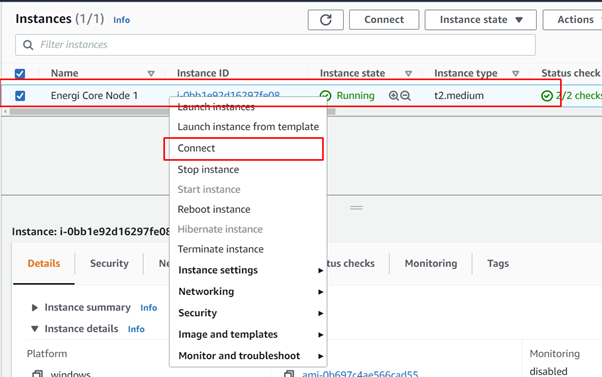
2.1.1. You will then be redirected to EC2 – Instance Page. There you will see your VPS with a blank name. Let’s name it now. Give it any name you want.

2.1.2. Next, let’s connect to your Windows VPS Instance. Right-click anywhere on VPS Instance name and click Connect.
2.1.3. You will be carried to the Connect to Instance page and click on RDP Client.
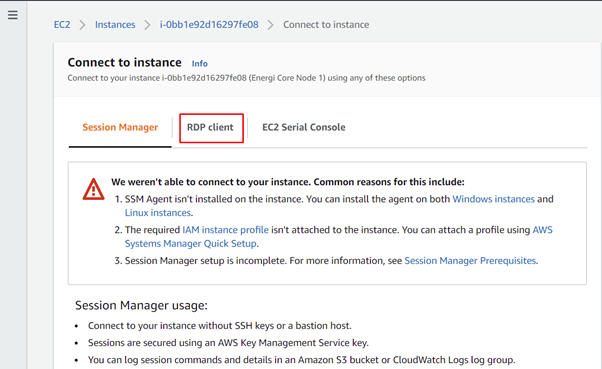
2.1.4. Here you will be given instructions on how to connect to the VPS instance. We first need to press Download remote desktop file. Save this file on your desktop.
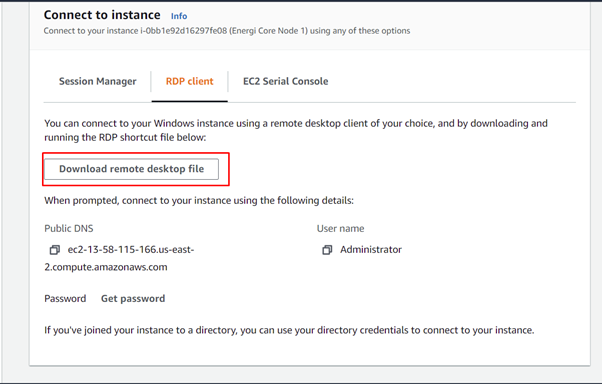
2.1.5. We require the password for the VPS. To get this, press Get Password. You are required to provide the Key Pair file we downloaded earlier. Click “browse” to find and select the key pair file on your desktop.


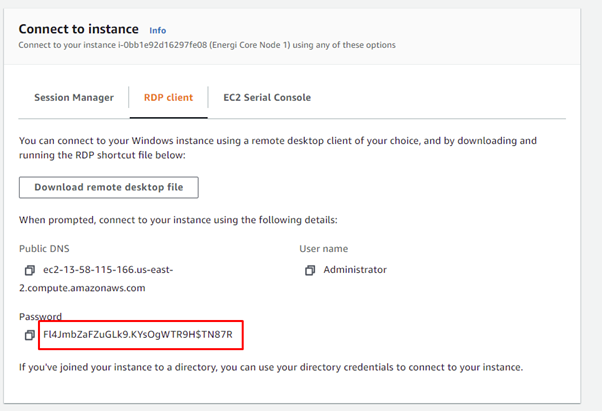
2.1.6. When you have completed this, click Decrypt Password.

2.1.7. Your password should now be visible. Copy and save the password in a safe location. We will need this to login to the VPS.
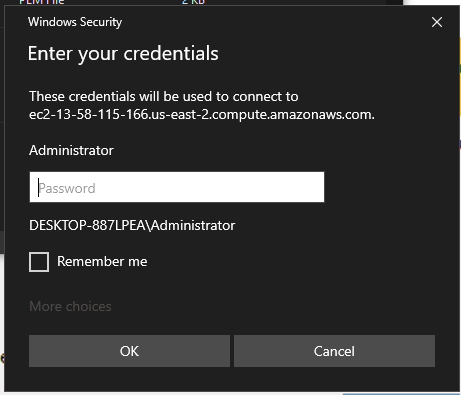
2.2. Open the RDP File you downloaded and saved to your desktop.

2.2.1. You may see this window pop up. Click Continue.

2.2.2. You will be prompted for a password. This will be the password we got a few steps ago. After entering your password, click OK. Check Remember me if you do not want to be prompted for the password in the future.
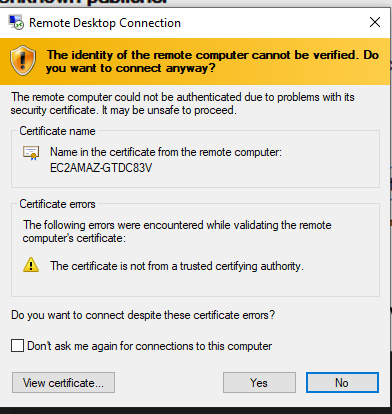
2.2.3. You will then see this new pop-up. Click Yes.
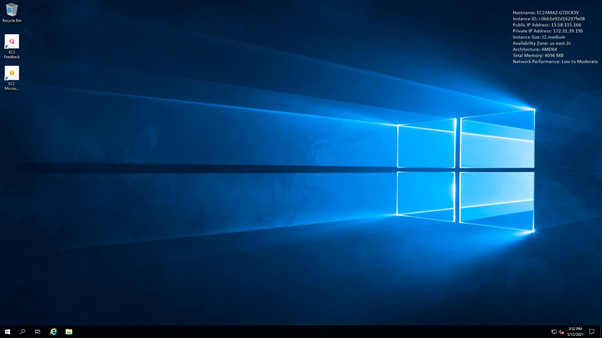
Congratulations. We have successfully connected to our Windows VPS Instance.
3. Configure Windows VPS Instance on AWS
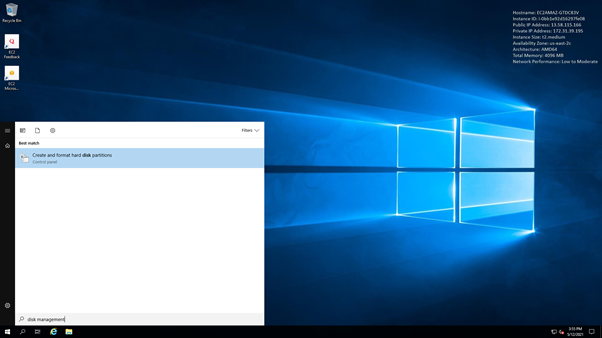
3.1. Disk Configuration: Click the Start Button on the bottom left corner of the screen. Then type: Disk Management in the search box.
![]()
3.1.1. You should see Create and format hard disk partitions. Click on that.
3.1.2. A new Window called Disk Management will appear.
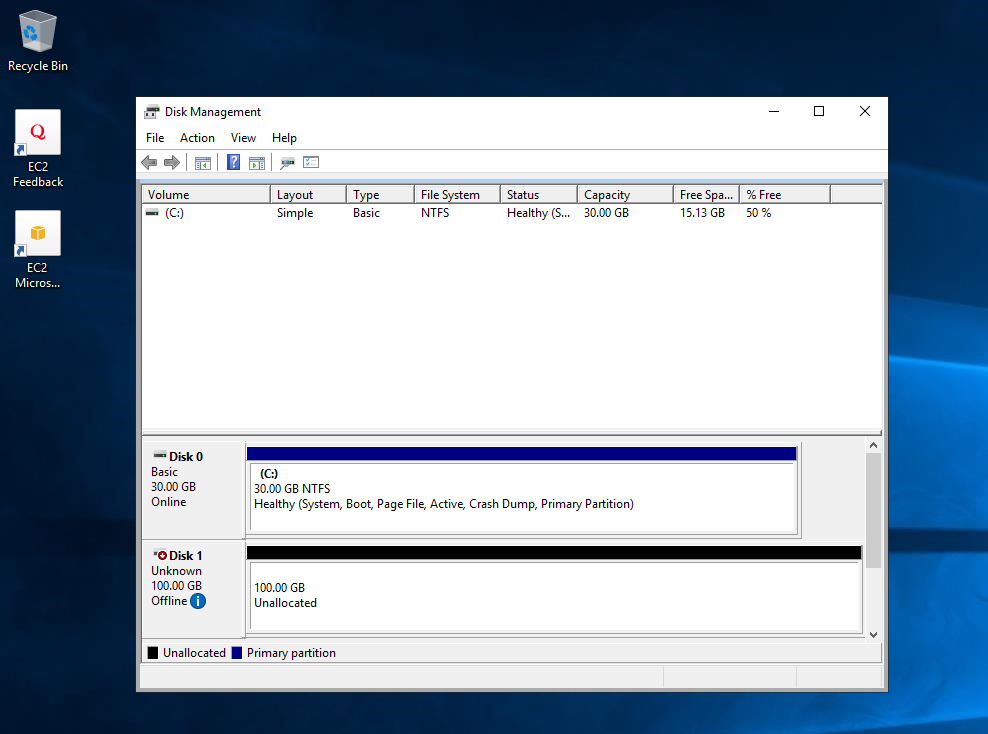
3.1.3. If you have been following this guide, you will see Disk1.

3.1.4. Right click on Disk 1, then click Online.

3.1.5. Right Click on Disk 1 again, then click Initialize Disk.

3.1.6. Initialize Disk Window should appear. Ensure the radio button is set to MBR, then click OK.

3.1.7. Right-click on the area that says 100.00 GB Unallocated. Click New Simple Volume.

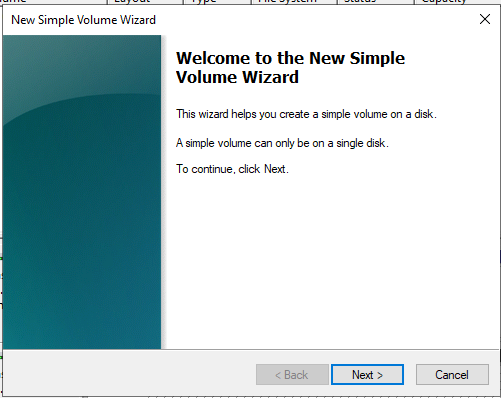
3.1.8. The New Simple Volume Wizard will appear. Click Next.
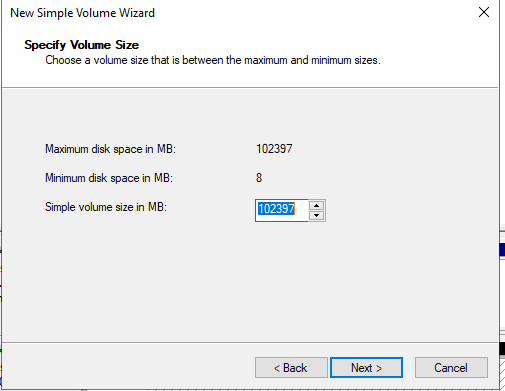
3.1.9. On the Specify Volume Size section, click Next.
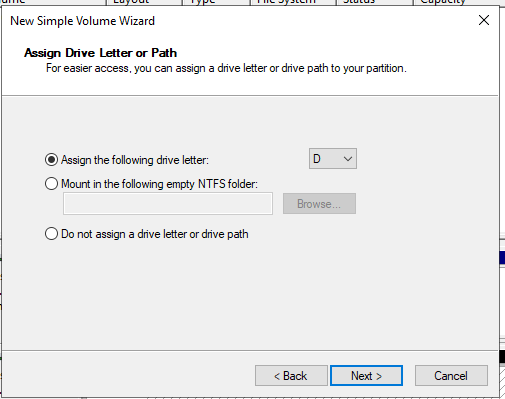
3.1.10. On the Assign Drive Letter or Path section, Click Next.
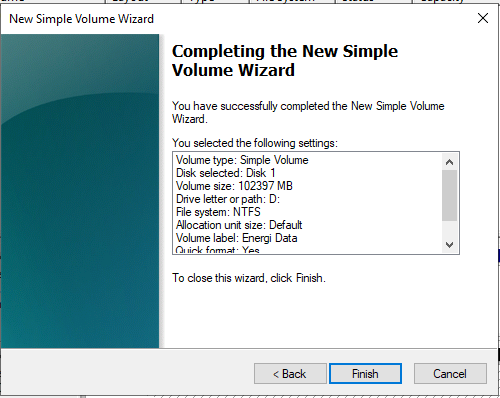
3.1.11. On the Format Partition section, you can change the Volume Label and then click Next.

3.1.12. We have completed creating a partition for our Energi Blockchain Data. Click Finish.
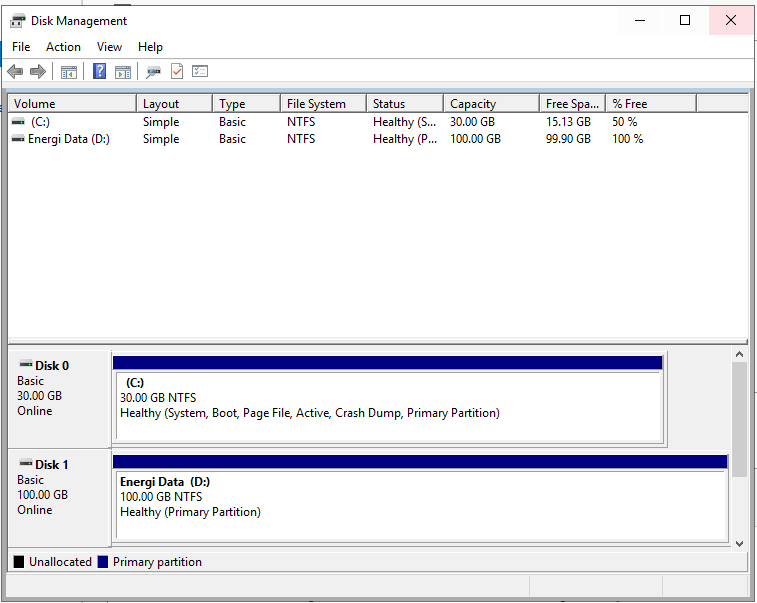
3.1.13. Your Disk Manager should now look like the picture below.
3.2. Download and Install Core Node
3.2.1. Open Internet Explorer.

3.2.2. In the address bar, use
https://wiki.energi.world/docs/downloads/core-node#Windows
to download the latest version of Core Node software. Click Windows x64 – Installer.

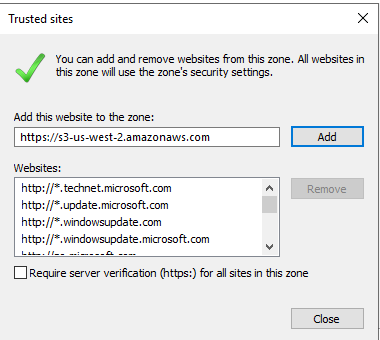
3.2.3. There will be a pop-up like the screenshot below. Click Add.
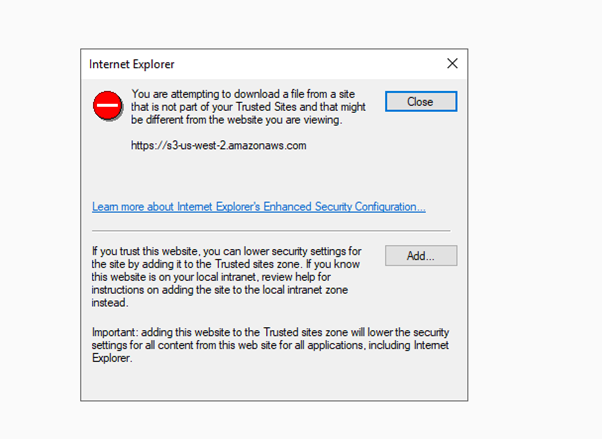
3.2.3.1. Click Add again, then Close.
3.2.3.2. Click Windows x64 – Installer again.

3.2.4. There will be a popup at the bottom of Internet Explorer. Click Save.

When it is finished downloading, click Run
![]()
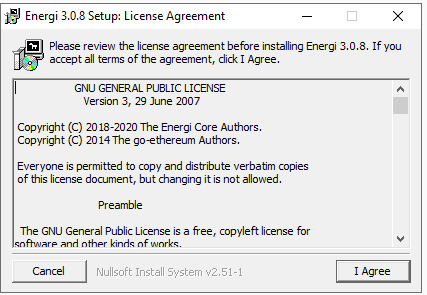
3.2.5. The Energi Installation will pop up. Click I agree.
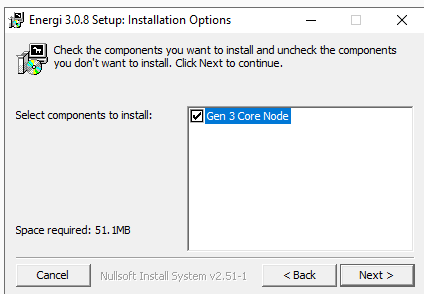
3.2.6. On the Setup: Installation Options section, click Next.
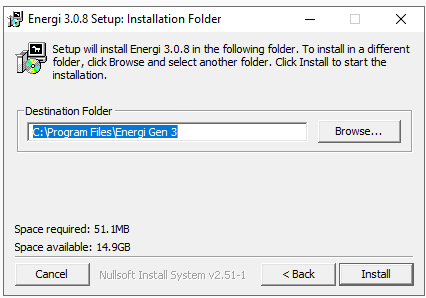
3.2.7. You can keep the Destination Folder the same as below and click Install.
3.2.8. It will take a few seconds to install. Click Close when completed.
3.2.9. The Core Node is now fully installed.
3.3 Configure Core Node
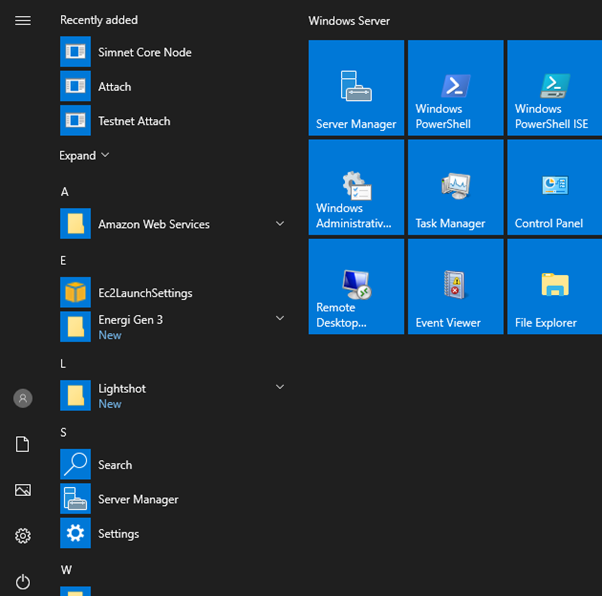
3.3.1. Click Start
![]()
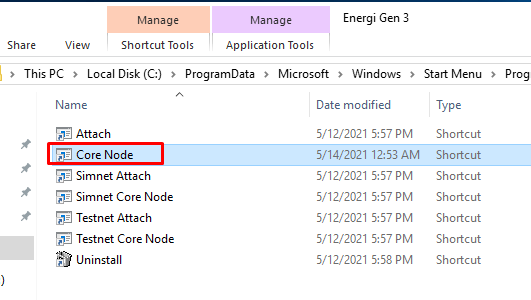
3.3.2. You should see the Energi Gen 3 folder. Click it.
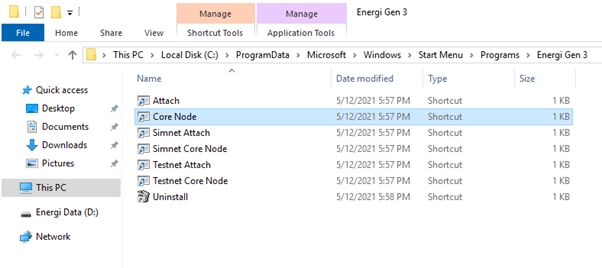
3.3.3. Here you will see Core Node. Right-click on it.
3.3.4. Move your cursor to More and click Open file location.

3.3.5. A folder will open.
3.3.6. Right click on Core Node and then click Properties.
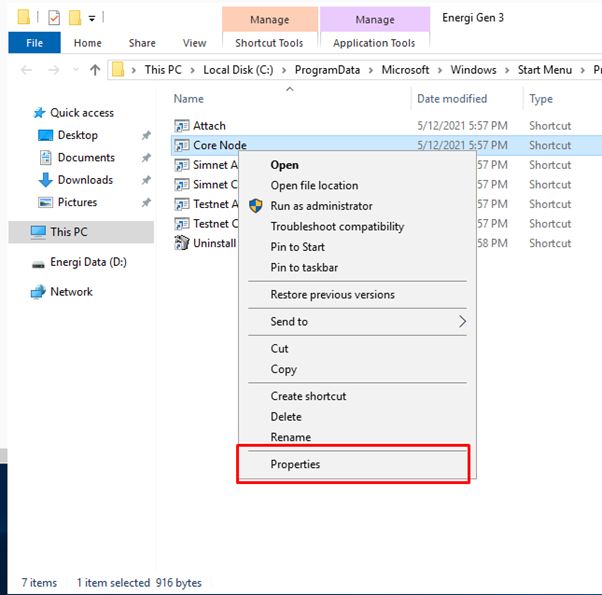
3.3.7. In the target field you should find:
"C:\Program Files\Energi Gen 3\energi3.exe" --cache=512
Change it to:
"C:\Program Files\Energi Gen 3\energi3.exe" --cache=512 --datadir "D:\EnergiCore3" --masternode
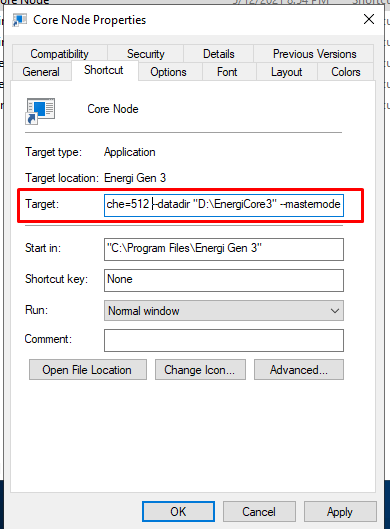
Click OK.
3.3.8. Run Core Node.
3.3.9. A Window should appear. This will create the necessary folders we require for Core Node. We will access the folder later. Minimize the Window.
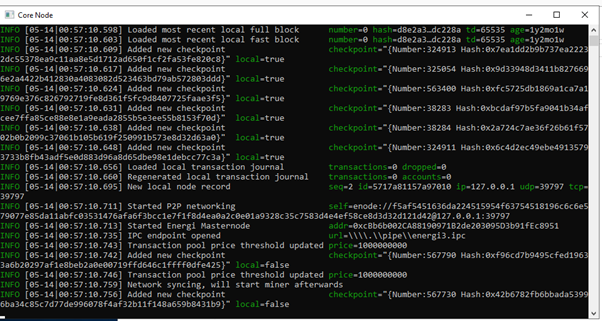
3.3.10. Now you can open Attach to interact with your Core Node.

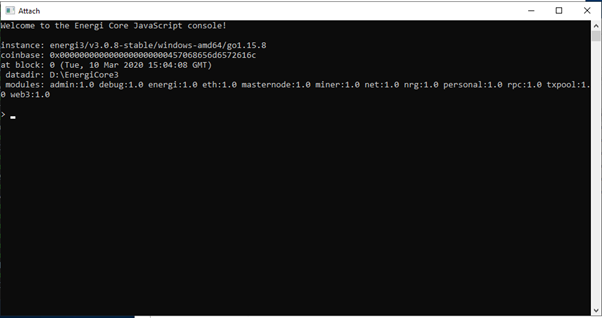
Your Core Node has been installed and will start synchronizing with the blockchain! You can follow the synchronization progress by using the nrg.syncing command on your Attach terminal. Keep in mind that for new installations, it can take an average of 48 hours to completely synchronize your node to the latest block.
3.4 Import Keystore File (Method 1)
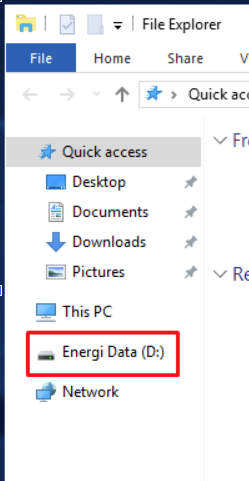
3.4.1. On the bottom left of your screen, you should find Windows Explorer. Click it.
![]()
3.4.2. Click on the D: Drive.
3.4.3. You should find the folder EnergiCore3. Open it.
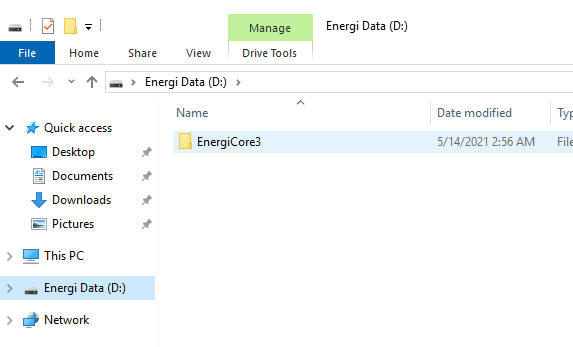
3.4.4. Inside you should find the Keystore folder. Open it. It will be empty.

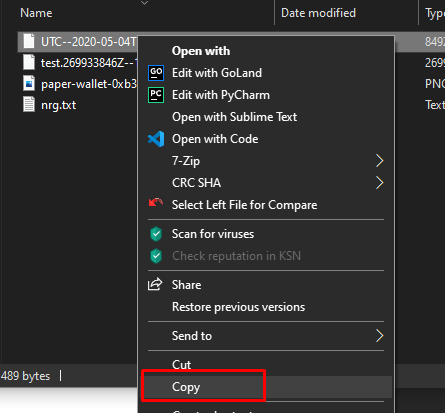
3.4.5. Find your keystore file on your computer/host machine. Right click on it and click Copy. Usually, the keystore file starts with UTC.
3.4.6. Return to your Remote Desktop Session by clicking the icon in your task bar to return to our keystore file folder on our Windows Virtual Machine.

3.4.7 Right click in the empty/white space of the folder, then click Paste. This copies your keystore file from your PC to the Windows Virtual Machine.


3.5 Import Keystore File (Method 2)
3.5.1. Open a notepad or any other file editor you may have.
3.5.2. Click File > Open and navigate to your keystore file location.
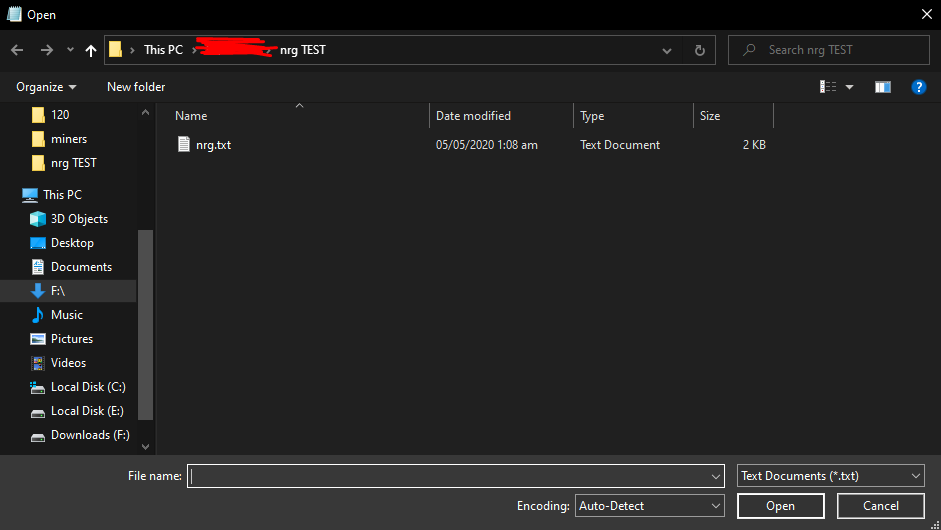
3.5.3. Change the dropdown on the right from Text Document to All Files.

3.5.4. All the files in the folder should appear. Select your keystore file (usually the file name starts with UTC). Then click Open.


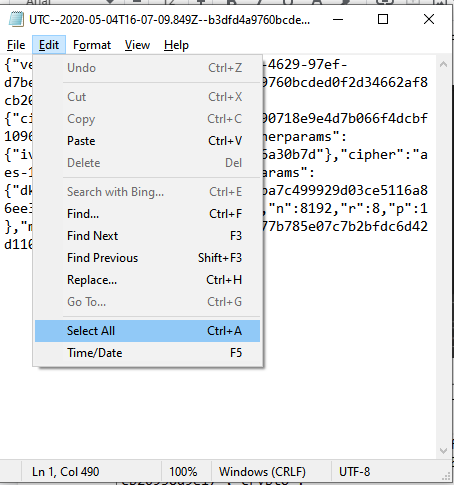
3.5.5. Click Edit > Select All.
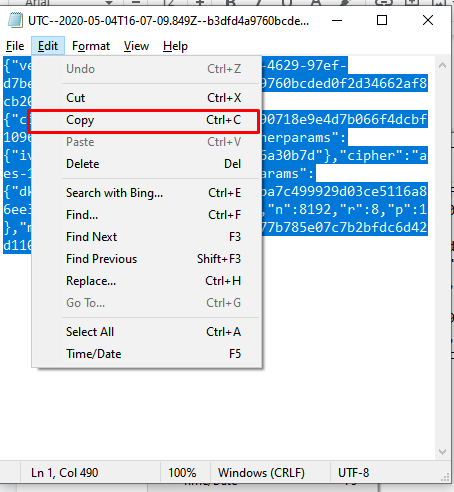
3.5.6. Click Edit, then Copy.
3.5.7. Return to your Remote Desktop Session by clicking the icon in your taskbar to return to our keystore file folder on our Windows Virtual Machine.
3.5.8. Click Start. Type notepad. Click on Notepad.
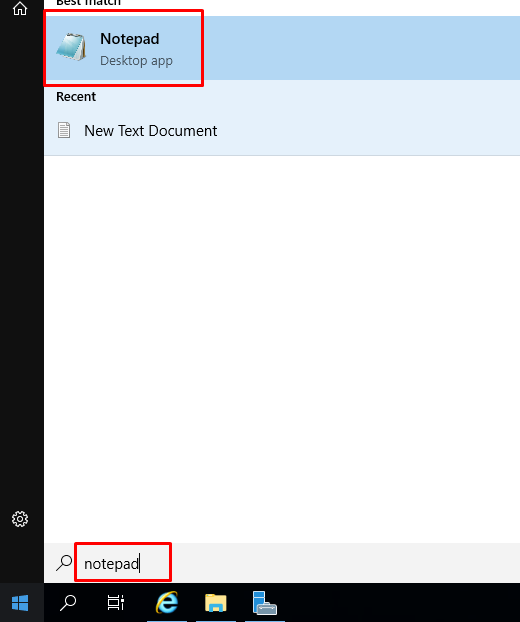
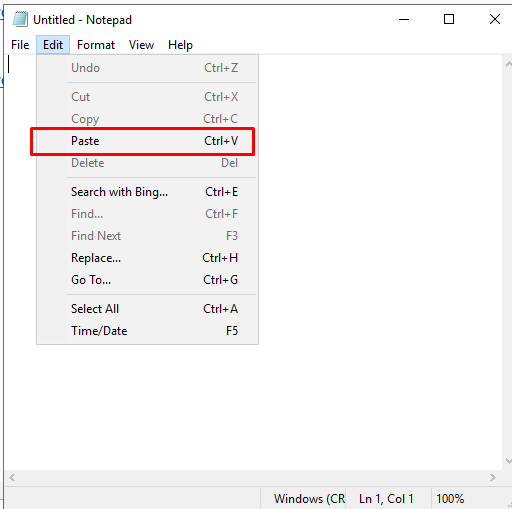
3.5.9. Click Edit, then Paste.The contents of your keystore file should now be seen in this text file. Click File, then Save As.

3.5.10. Navigate to D:\EnergiCore3\keystore
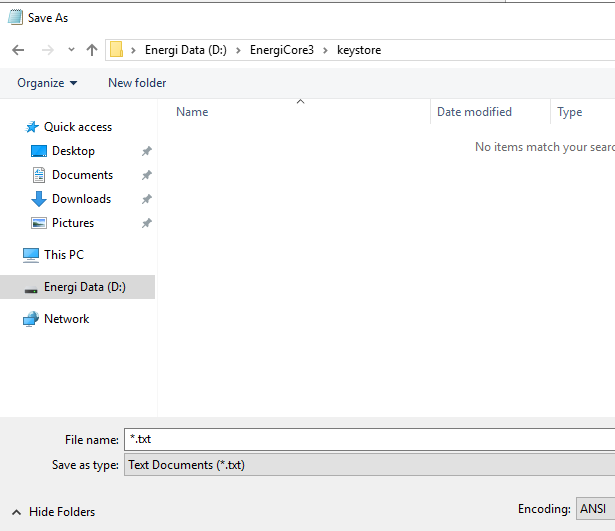
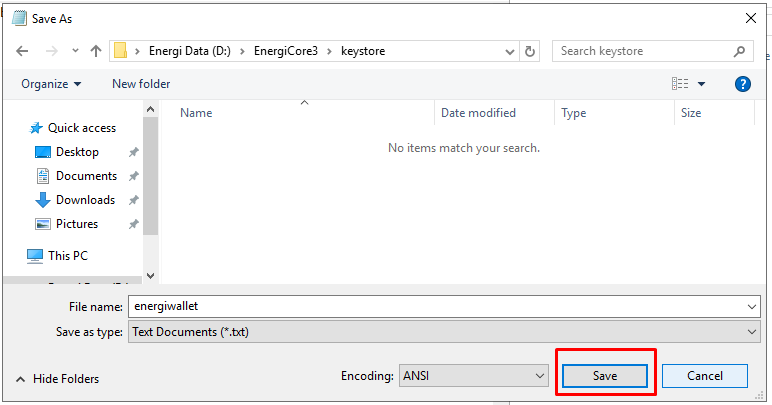
3.5.11. Change File Name to energiwallet.json and change Save as type to All Files.

3.5.12. Click Save.
4. Deposit Collateral & Announce Masternode
4.1. If Core Node is not already open, Start Core Node and Attach to the Core Node. Otherwise, Start Attach.
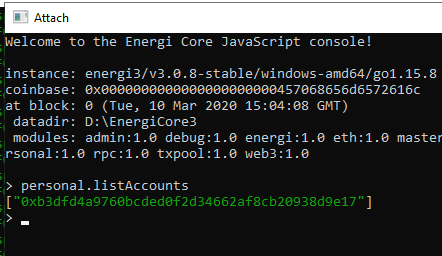
4.2. In Attach, type the command:
personal.listAccounts
This should show your wallet address:
4.3. We can now add collateral to our Masternode. Type the following command to add 1000 NRG collateral:
masternode.depositCollateral(personal.listAccounts[0], web3.toWei('1000', 'ether'), 'password')
Change password to the password used to unlock your keystore file. For example, the screenshot below shows the password 1234 to unlock the keystore file. The output is the transaction id.
![]()

4.4. We can now announce our Masternode. Type the following command:
masternode.announce(personal.listAccounts[0], admin.nodeInfo.enode, 'password')
Change password to the password used to unlock your keystore file. For example, the screenshot below shows the password 1234 to unlock the keystore file. The output is a transaction id.
![]()
![]()
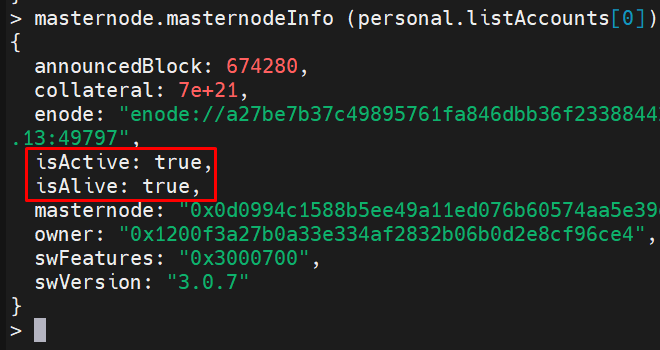
4.5. We can now check our Masternode status to ensure it’s working correctly. Type the following command:
masternode.masternodeInfo (personal.listAccounts[0])
isActive and isAlive should be true. If it isn’t, wait for your node to fully sync with the blockchain. If you need any help, contact Energi Support.
Congratulations! You have set up your masternode on a Windows VPS at AWS.