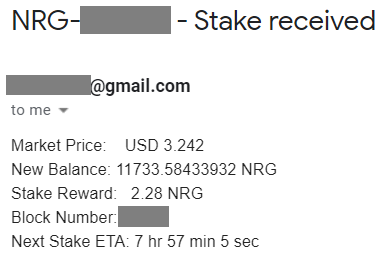
Energi Core Node Monitor
0 Introduction
This guide will help setup NodeMon (Node Monitor) on a Linux VPS. The script will run personal.listAccounts to determine the accounts on the Core Node. Once set up, NodeMon will run every 10 minutes to check if rewards from stake and/or masternode were received during the last 10 minutes. NodeMon starts 5 blocks (or 5 minutes) from the most recent block to allow time for the block to be written in the blockchain ledger.
The following parameters are checked and reported on:
- Check Disk Space
- Check CPU Load
- Check Swap Usage
- Check Memory Usage
- Check System Clock
- Check Debsum (every 2 hours)
- Check Security (every 2 hours)
NodeMon is dependent on Discord and Telegram when posting a message. If for any reason it is not able to post the message, you will not see it in Discord or Telegram.
1 Setup Discord
If you want to receive notifications in Discord, follow the steps below:
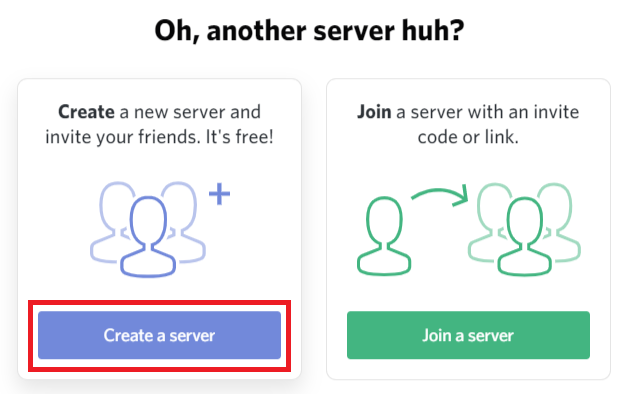
1.1 Add a Server
1.2 Create a Server
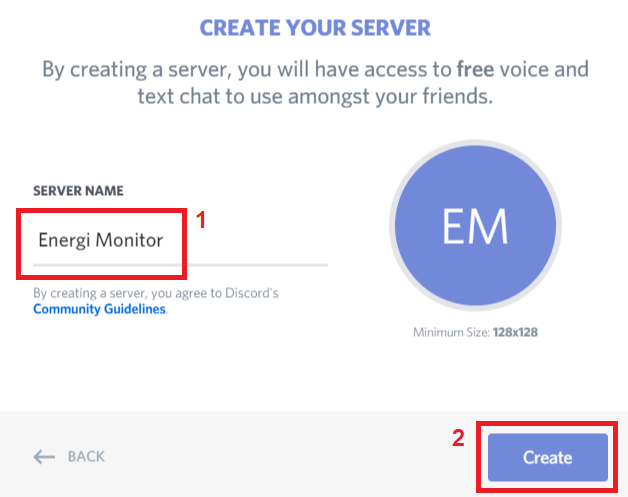
1.3 Server Name
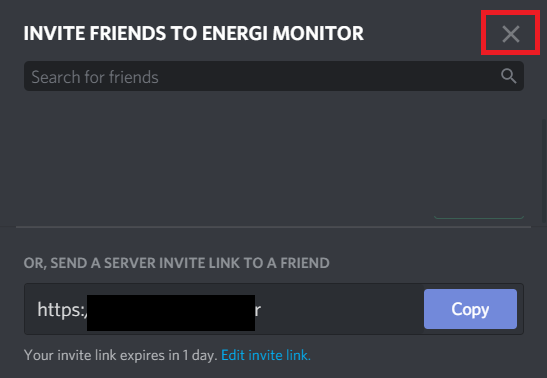
1.4 Invite Friends
Close the window by clicking on the x
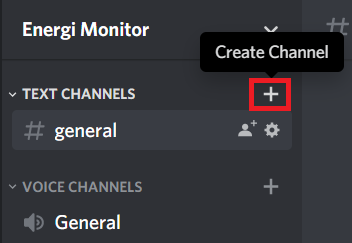
1.5 Create Channel
Click on + besides TEXT CHANNELS
1.6 Create Four Channels
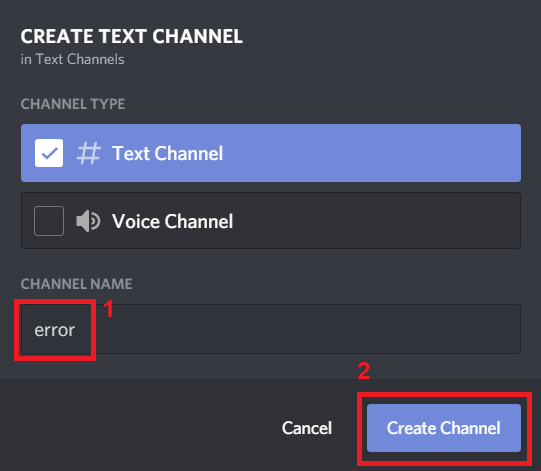
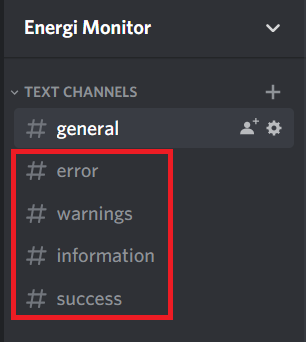
Enter the channel name then click Create Channel. Create 4 channels named:
- Error
- Warning
- Information
- Success
1.7 Service Setting
Clock on the menu option besides Energi Monitor:
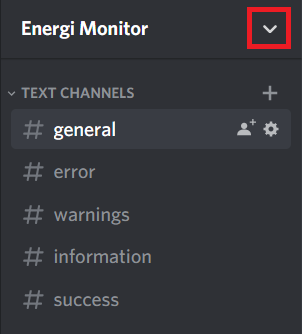
Select Server Settings:

1.8 Create Four Webhooks
Click “Integrations” and then “View Webhooks”
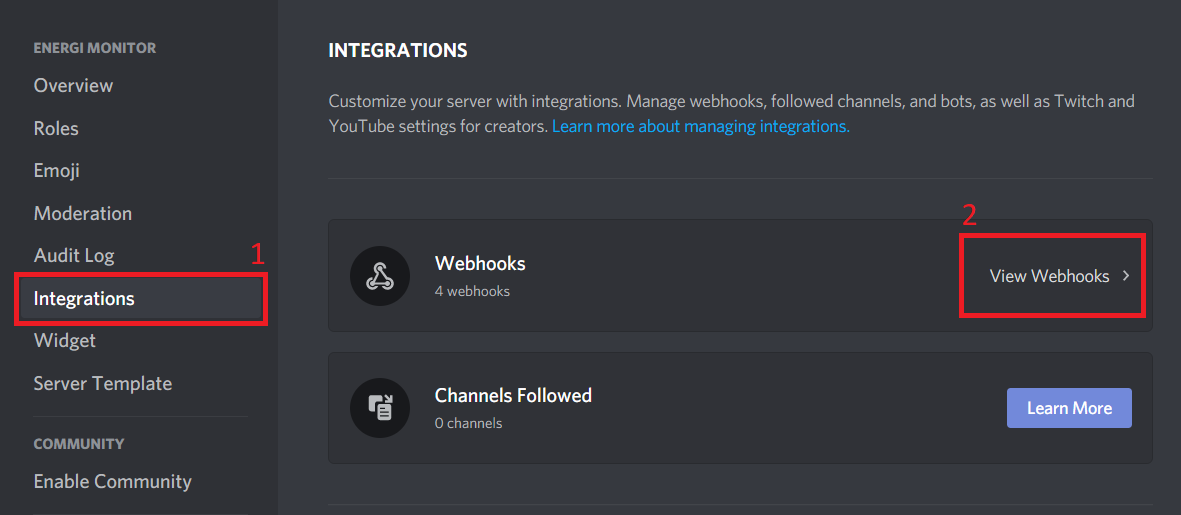
Click "New Webhook"

1.8.1 Webhook - Error
Enter the name of the webhook and the channel associated with the webkook. Copy the webhook URL and then click Save.
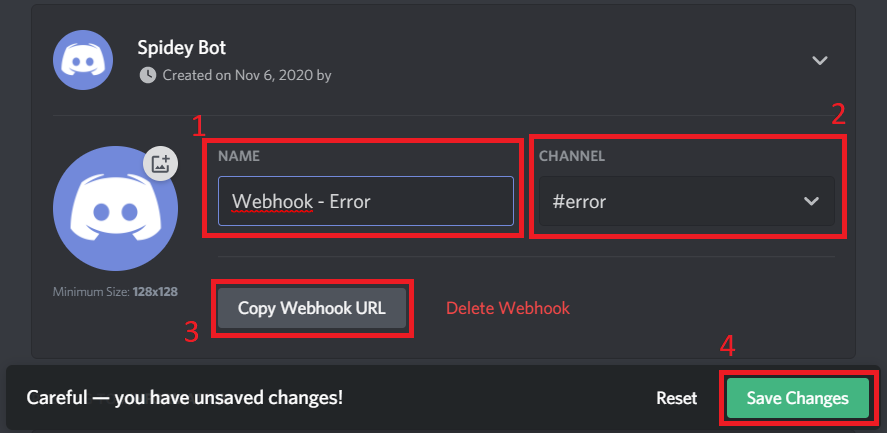
Open a text editor and save the URL. You will need the URL when installing the toolkit.
1.8.2 Create remaining webhooks (optional)
Repeat step 1.8.1 if you want to categorize the messages on your Discord server.
Create webhooks for Warning, Information and Success. Save the respective URLs in the same text editor.
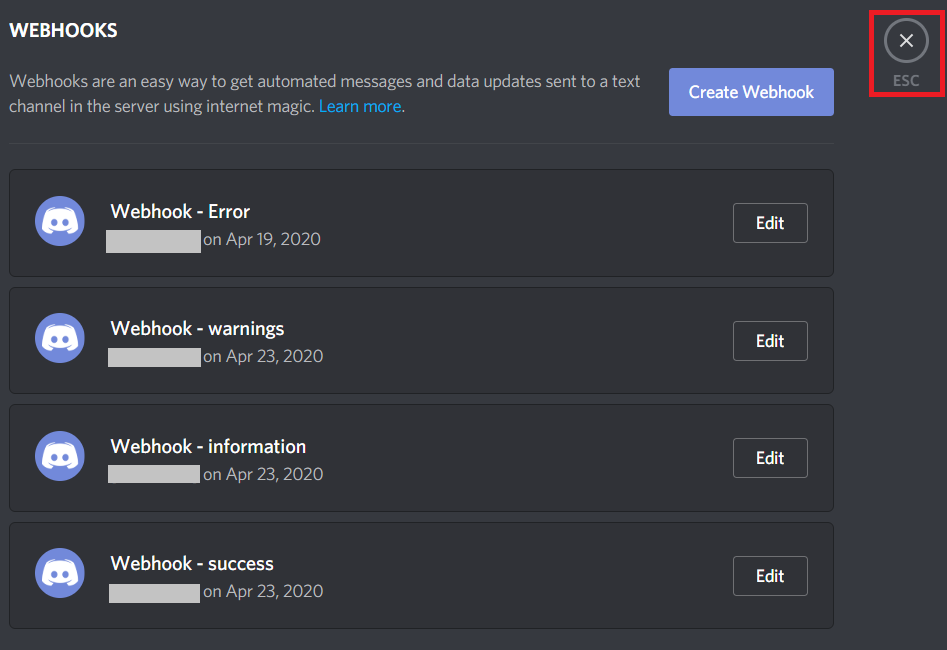
1.9 Close Webhook
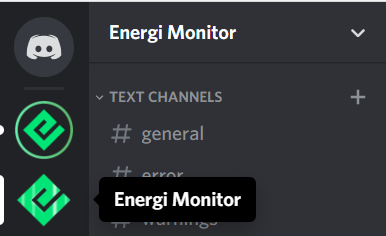
1.10 Change Icon for Energi Monitor (optional)
Click on Overview and change the icon for Energi Monitor. You can use the image provided in the link below:
2 Setup Telegram
If you want to receive notifications in Telegram, follow the steps below:
2.1 Start BotFather
Go to the link below to start BotFather:
https://web.telegram.org/#/im?p=@BotFather
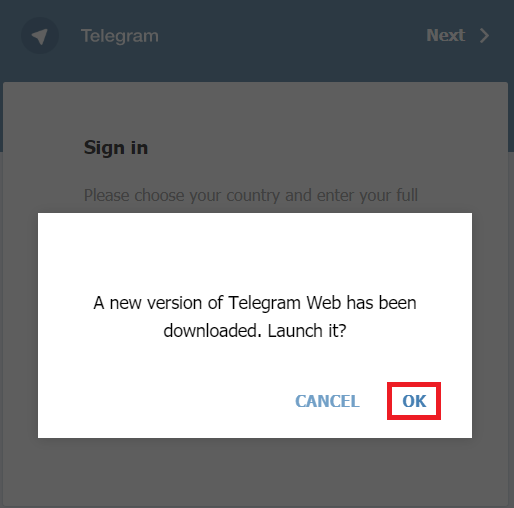
If asked, upgrade to the new version of Telegram:
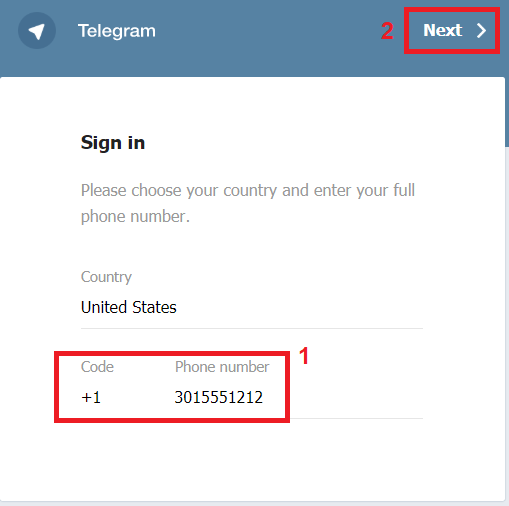
Sign in / sign up to Telegram:
2.2 Start the bot
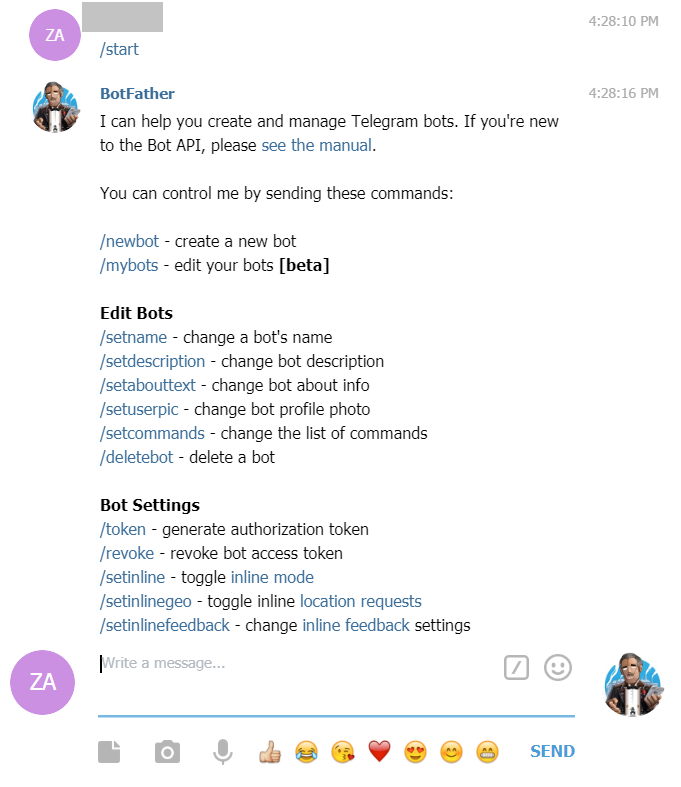
Once you are in BotFather, run the following command to create a custom bot for Energi Monitor:
/start
2.3 Create a new bot
Next run the following commands to create a new bot:
/newbot


2.4 Name your bot
Give your bot a name like “Energi Monitor”. This is what will show up on Telegram.
You will then have to create a bot. Follow the instructions noted on the page.

2.5 Get the Token to Access the Bot
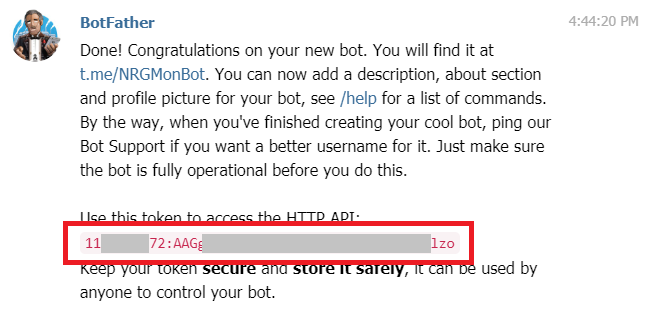
Once you completed the last step, you will be presented with the token to access the bot. Copy and paste the token into a text editor. You will need the information when you install the monitoring toolkit.
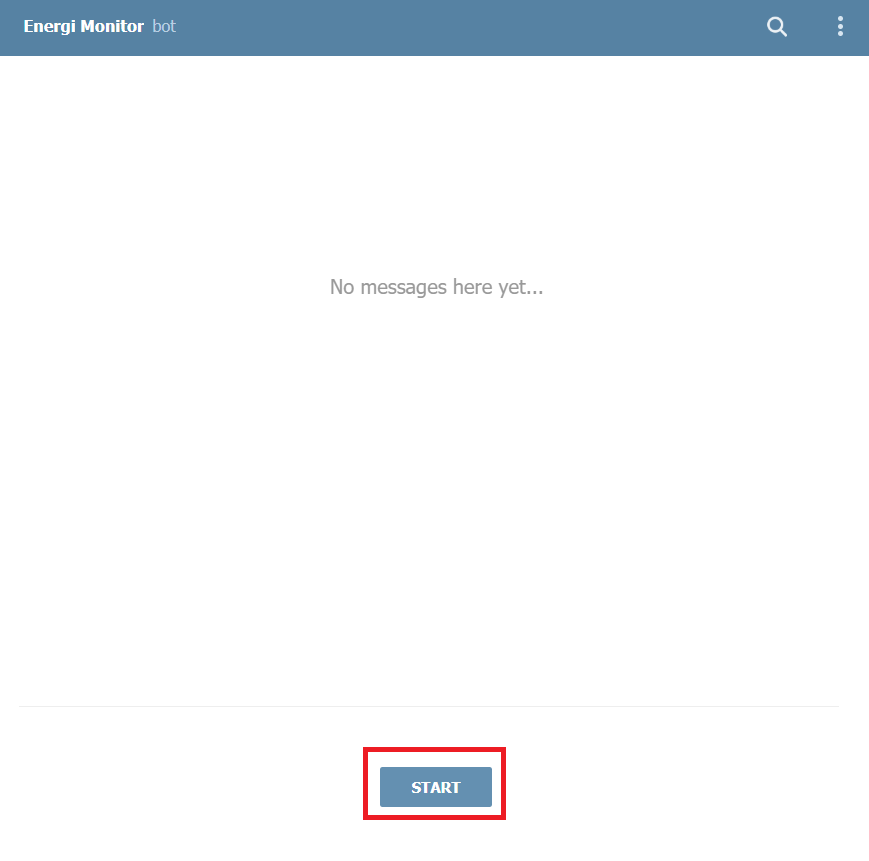
2.6 Search bot and Start
Search your bot and then start it.
2.7 Change Bot Icon (optional)
Download the nodemon_icon image from the repository and save it in the Downloads folder.
Run the following command in BotFather to add an image to the bot:
/setuserpic
Choose the bot and upload the nodemon_icon image from the Downloads folder.
3 Install NodeMon
3.1 Setup Latest Energi Core Node
You have to first setup the latest Energi Core Node and make sure it is fully synchronized with the blockchain network. Run the following command to setup and configure NodeMon on your VPS.
bash -ic "$(wget -4qO- -o- raw.githubusercontent.com/energicryptocurrency/energi3-provisioning/master/scripts/linux/nodemon.sh)" ; source ~/.bashrc

3.2 Use the alias presented or enter an alias. The alias will be used on the report logs.

3.3 Select y if you want to display the IP address. If not, backspace and enter n followed by ENTER.
3.4 Select y to Setup Discord Bot. If you do not want to set up the Discord Bot, backspace and enter n followed by ENTER to continue.
3.4.1 Copy and paste the Discord errors webhook URL. Press ENTER to continue

3.4.2 Copy and paste the warnings webhook URL. Press ENTER to continue

3.4.3 Copy and paste the informations webhook URL. Press ENTER to continue

3.4.4 Copy and paste the success webhook URL. Press ENTER to continue

3.4.5 You will see the message Discord Done when the webhooks are set up for Discord Bot.
3.5 To Setup Telegram Bot token, press the BACKSPACE key followed by y. Press ENTER to continue.
3.5.1 Copy and paste the Telegram Token. Press ENTER to continue.
3.5.2 Once the Telegram token is setup, you will see the message Telegram Done.

This will complete the installation of nodemon on the Core Node VPS.
4 Verify the Installation
Go through the following steps to validate nodemon is setup correctly:
4.1 Check Status
On the VPS, run:
sudo systemctl status nodemon.timer

You will see the state to be active. It will also indicate then the nodemon script will next run.
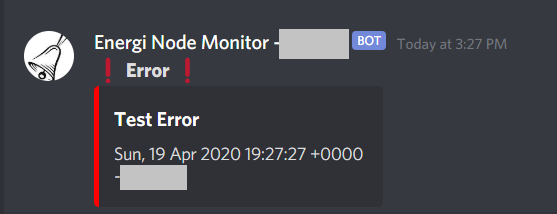
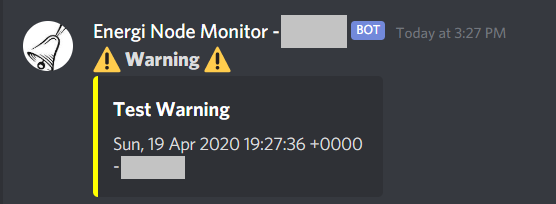
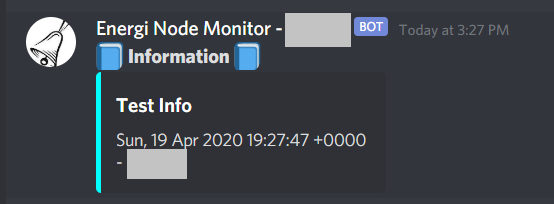
4.2 Check Discord:
The following 4 test messages will be posted to the Discord server you created:
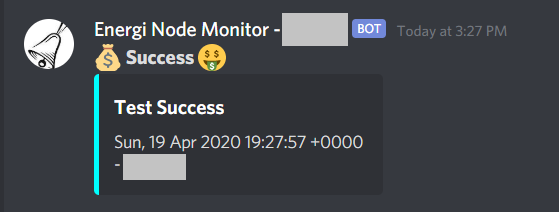
4.3 Check Telegram
You will see the following test message in the bot channel you created.
5 Custom Settings
5.1 Parameters
There are few parameters that can be set or changed in NodeMon. In order to change the parameters, you need to download the nodemon.conf file from Github and then update the parameters:
sudo wget -q4o- raw.githubusercontent.com/energicryptocurrency/energi3-provisioning/master/scripts/linux/nodemon.conf -O /var/multi-masternode-data/nodebot/nodemon.conf
5.1.1 Change Currency
You can change the curreny displayed in NodeMone by changing the CURRENCY parameter in nodemon.conf file.
Get currency symbol from https://justforex.com/education/currencies
sudo nano /var/multi-masternode-data/nodebot/nodemon.conf
To save and exit, ctrl+x and y, then Enter.
5.1.2 Check Custom Gen 3 Address(es)
You can check Gen 3 address(es) hosted on the node you are running and elsewhere by editing the LISTACCOUNTS parameter in nodemon.conf file. If you add addresses, it will show aggregated balance of all the accounts.
sudo nano /var/multi-masternode-data/nodebot/nodemon.conf
Add all the accounts separated by a space. Example:
LISTACCOUNTS=’0x82cFC8ea7043b5459d0A4C9dbCc4c42106C8c0A5 0x67319f845917Da973570704b811B641D3f335fA9’
To save and exit, ctrl+x and y, then Enter.
5.1.3 Sending Email and/or SMS
NodeMon has the ability to send email and SMS messages. The information is provided AS-IS. It is not supported by the Energi Support Team. We are providing the steps if you want to try it out on your own.
SMS uses gateways to send the messages. It has only been tested with US Mobile Carriers. Check with your mobile carrier if there is any additional cost associated with the service.
5.1.3.1 Install Additional Software
Install SSMTP to sent messages:
sudo apt install -y ssmtp
5.1.3.2 Edit SSMTP Configuration
You will the following information to setup email forwarding:
- Your email gateway
- Your email address
- Your email password
Edit ssmtp.conf file:
sudo nano /etc/ssmtp/ssmtp.conf
To save and exit, ctrl+x and y, then Enter.
Example for GMail:
#
# Config file for sSMTP sendmail
#
# The person who gets all mail for userids < 1000
# Make this empty to disable rewriting.
root=your_email@gmail.com
# The place where the mail goes. The actual machine name is required no
# MX records are consulted. Commonly mailhosts are named mail.domain.com
mailhub=smtp.gmail.com:465
# Where will the mail seem to come from?
rewriteDomain=gmail.com
# The full hostname
hostname=vultr.internal
# Are users allowed to set their own From: address?
# YES - Allow the user to specify their own From: address
# NO - Use the system generated From: address
FromLineOverride=YES
# Use SSL/TLS before starting negotiation
UseTLS=Yes
#
AuthUser=your_email@gmail.com
AuthPass=your_gmail_password
You will receive a notice in GMail to allow emails to be sent from the VPS. You have to approve the request.
5.1.3.3 Edit nodemon.conf
You have to add your email and mobile numbers in nodemon.conf.
Look up your provider from https://www.lifewire.com/sms-gateway-from-email-to-sms-text-message-2495456. You need to change the SENDTOGATEWAY parameter in the file.
sudo nano /var/multi-masternode-data/nodebot/nodemon.conf
To save and exit, ctrl+x and y, then Enter.
Example for T-Mobile USA:
# Set Email, Mobile and Email-to-SMS Gateway information
SENDEMAIL=Y
SENDSMS=Y
# Set EMAIL if SENDEMAIL is Y
SENDTOEMAIL=your_email@gmail.com
# Set SMS information if SENDSMS is Y
SENDTOMOBILE=12015551212
# Email to SMS gateways in the US
# https://www.lifewire.com/sms-gateway-from-email-to-sms-text-message-2495456
SENDTOGATEWAY=tmomail.net
6 Fix rkhunter Error
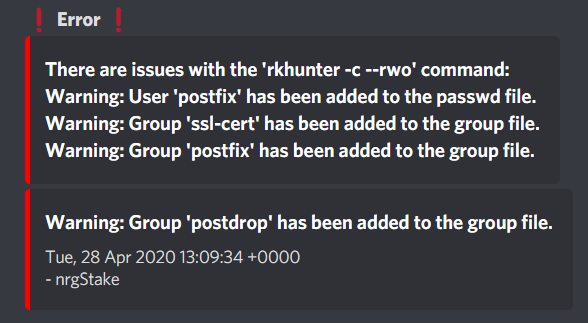
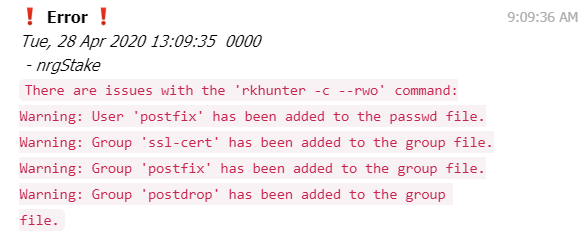
Login to your VPS and then complete the following steps if you see the following warning message:
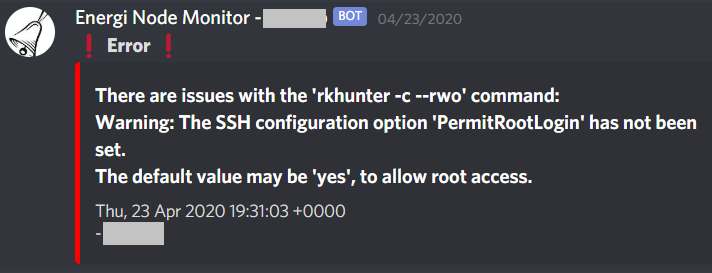
Add PermitRootLogin yes to /etc/ssh/sshd_config:
sudo nano /etc/ssh/sshd_config
To save and exit, ctrl+x and y, then Enter.
Restart sshd daemon:
sudo systemctl restart sshd
And then change to: ALLOW_SSH_ROOT_USER=yes to /etc/rkhunter.conf. If you see a # in front of ALLOW_SSH_ROOT_USER, remove the #. # is used to comment the line.
sudo nano /etc/rkhunter.conf
To save and exit, ctrl+x and y, then Enter.
7 Useful Commands
- Start NodeMon
sudo systemctl start nodemon.timer
- Stop NodeMon
sudo systemctl stop nodemon.timer
- Status of NodeMon
systemctl status nodemon.timer
- Check running version of NodeMon:
/var/multi-masternode-data/nodebot/nodemon.sh version
- Completely uninstall NodeMon:
/var/multi-masternode-data/nodebot/nodemon.sh reset
8 Utilities
8.1 Purge Side Chain Reward Data
Run the following command to remove any staking reward data stored while on side chain. It will add any missing rewards to the local nodemon database.
bash -ic "$(wget -4qO- -o- raw.githubusercontent.com/energicryptocurrency/energi3-provisioning/master/scripts/linux/nodemon-resync.sh)" ; source ~/.bashrc
8.2 Add All Missing Stake Reward Data
This script will add all staking rewards that were missing from the nodemon database:
bash -ic "$(wget -4qO- -o- raw.githubusercontent.com/energicryptocurrency/energi3-provisioning/master/scripts/linux/missing_stake_rewards.sh)"; source ~/.bashrc
8.3 Add Missing Masternode Reward Data
This script will add any missing masternode reward data for the block range specified for the address specified.
bash -ic "$(wget -4qO- -o- raw.githubusercontent.com/energicryptocurrency/energi3-provisioning/master/scripts/linux/missing_mn_rewards.sh)" '' START_BLOCK END_BLOCK MN_ADDR ; source ~/.bashrc
Replace the following arguments. You need to include '' in the script:
Script arguments:
START_BLOCK : Block number to start from (eg: 50000)
END_BLOCK : Block number to stop at (eg: 60000)
MN_ADDR : Masternode owner address (eg: 0x1234...890)
8.4 Generate CSV File For Rewards Received
You can generate a CSV (Comma Separated Value) file of the rewards that are stored on the computer.
Download the report generator:
wget -4qo- "https://raw.githubusercontent.com/energicryptocurrency/energi3-provisioning/master/scripts/linux/nodemon-report.sh?dl=1" -O $HOME/energi3/bin/nodemon-report.sh --show-progress --progress=bar:force:noscroll 2>&1
chmod 755 $HOME/energi3/bin/nodemon-report.sh
To generate the report, run:
nodemon-report.sh
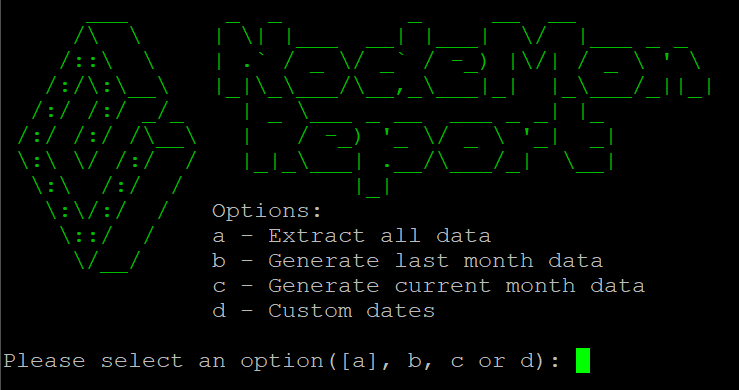
Select the option to generate the report.
9 Sample Discord Reports
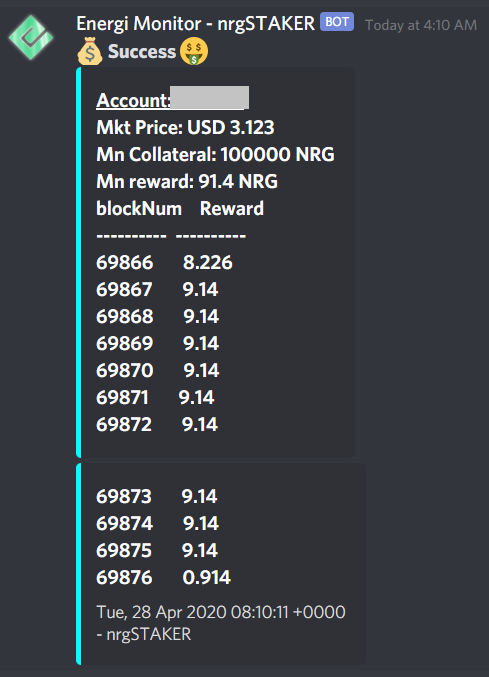
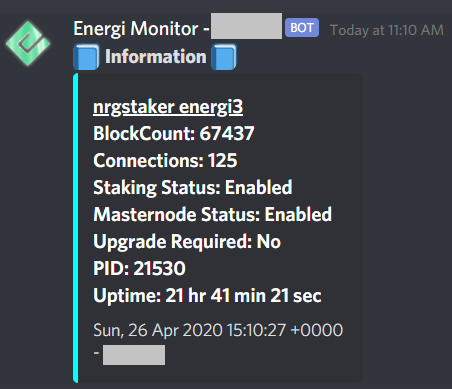
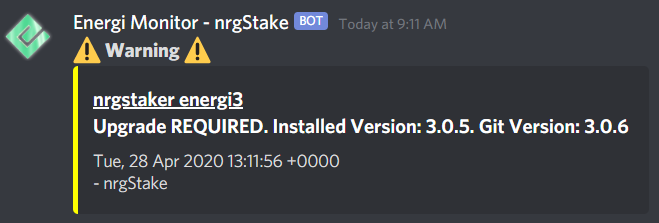
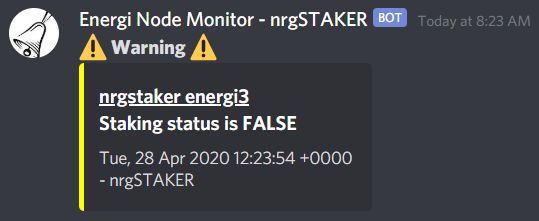
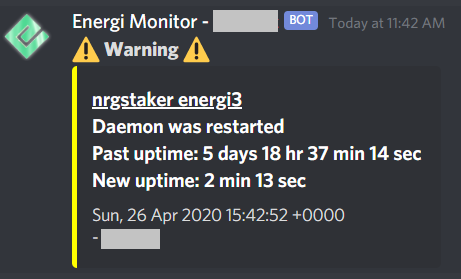
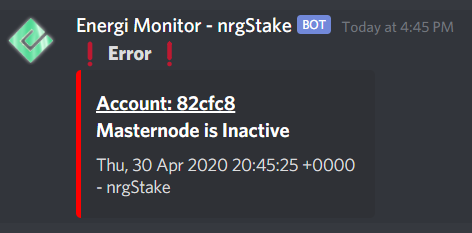
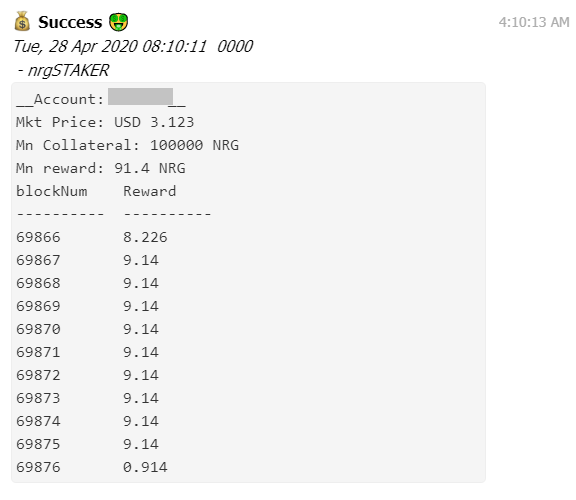
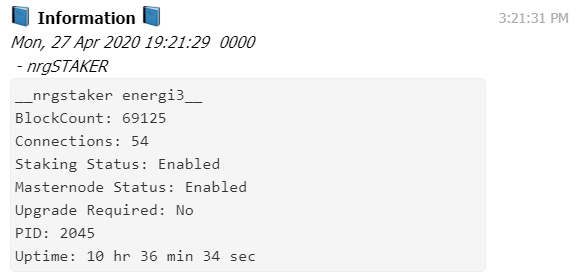
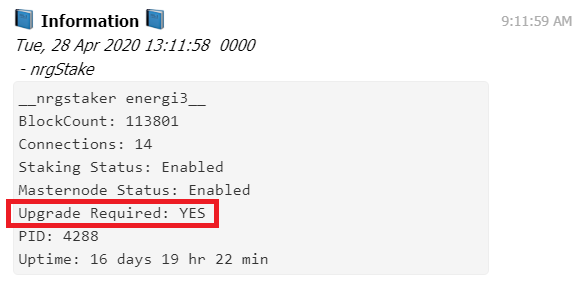
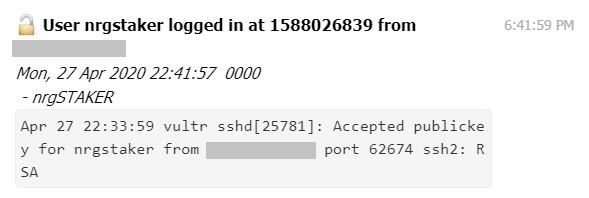
Following are few sample reports you will see in the Discord server you created:
9.1 Success


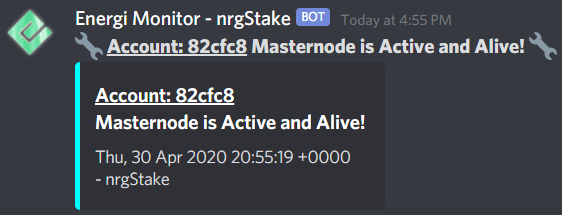

9.2 Information
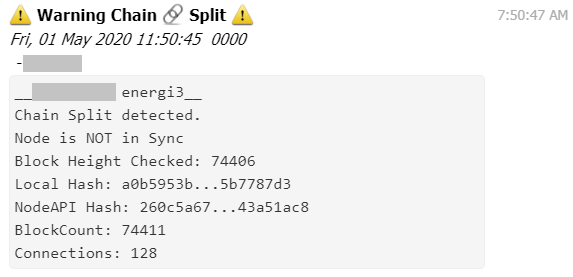
9.3 Warning


9.4 Errors

10 Sample Telegram Reports
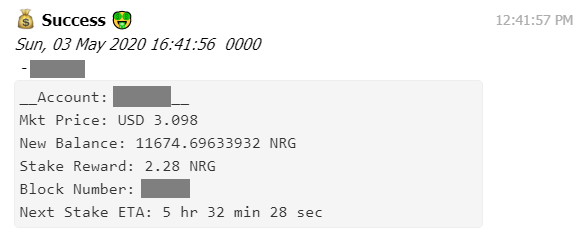
Following are few sample reports you will see in the Telegram bot you created:
10.1 Success

10.2 Information
10.3 Warnings

10.4 Errors
11 Sample Email Reports
