Migrate a 32-bit Gen 2 Energi Core Wallet
If you have a 32-bit Windows computer running the Gen 2 Energi Core Wallet, please use this guide to migrate your Gen 2 NRG to Gen 3 NRG.
All others, use Energi Core Wallet v2.4.1 to migrate their wallets. For more information look at the document below: Migrate from [Gen 2] Energi Core Wallet
1. Extract Wallet Data from Energi Gen 2
First extract the entire Gen 2 Energi Core Wallet using the dumpwallet command. It will dump all private keys associated with the wallet into a file.
Safeguard the dump file as there is no password or encryption on the data. If anyone gets access to this file before you complete the migration, they will be able to claim all your funds. Once the migration is successfully completed, delete the dump file.
Start Gen 2 Energi Core Wallet on your Windows PC. The Core Wallet does not need to completely sync with Gen 2 Energi blockchain. If you see the following screen, press Hide to continue
![gen2-wallet-behind]../assets/images(/mig-32bit-wallet/gen2-wallet-behind.png)
Go to Settings -> Unlock Wallet...

An Unlock wallet pop up will appear. Enter your wallet passphrase and click Ok. The core wallet will stay unlocked until you exit the application or lock it again.

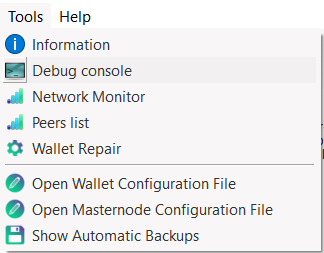
Next, open Tools -> Debug console:
In the Debug console, type dumpwallet:
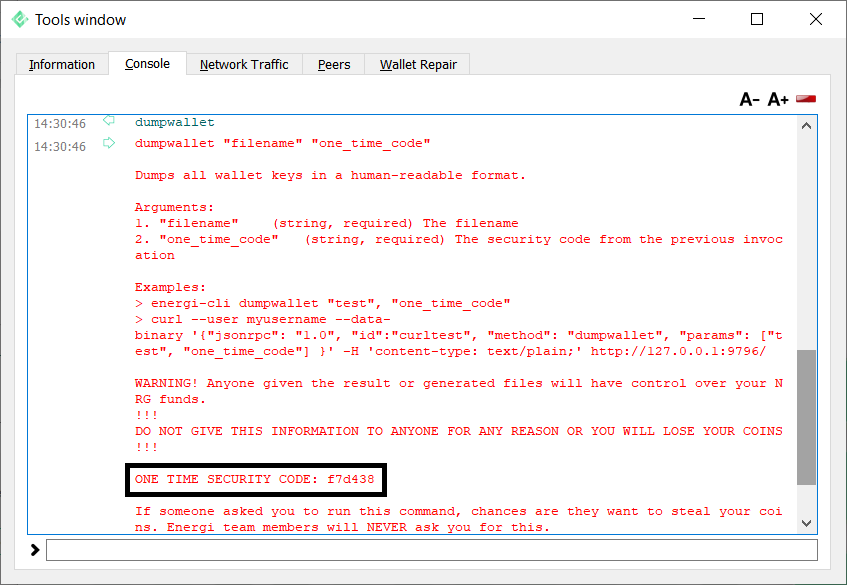
The first time you enter dumpwallet, it will provide a One Time Security Code (OTSC). The OTSC changes every time you run the dumpwallet command.
Now run the following command. Replace OTSC with the number you were presented when you ran dumpwallet.
dumpwallet c:/energi3/energi2_wallet.dump OTSC

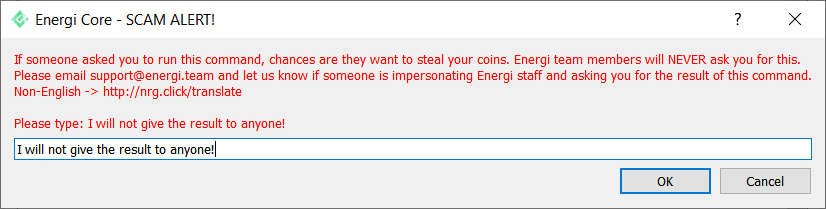
A pop up Energi Core - SCAM ALERT screen will appear. Type the text (I will not give the result to anyone!) in the box and press Ok.
This will create the dump of your Gen 2 Energi Core Wallet. The file will be saved in C:\energi3 directory.
You will see a null output on the Debug console like below. This is normal.

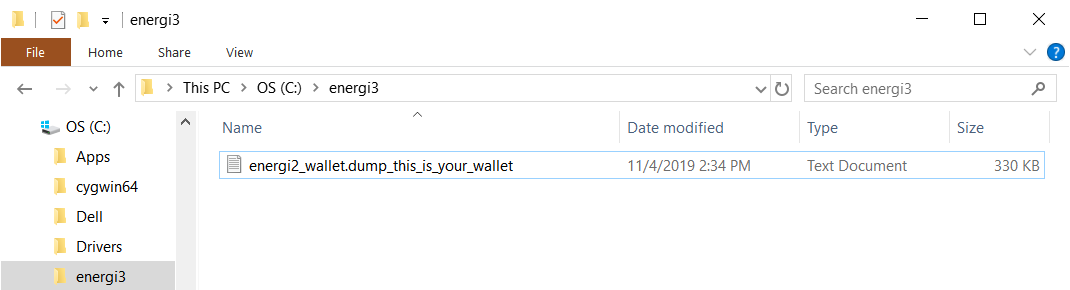
Using File Explorer locate the dump file created in the last step. The file will have the following name (a _this_is_your_wallet.txt is tagged to the dump file) :
energi2_wallet.dump_this_is_your_wallet.txt
On the Mac, use the following command on the debug console:
dumpwallet "/Users/USERNAME/Desktop/energi2_wallet.dump" OTSC
You have to include the double quotes. Replace USERNAME with your account name on the Mac.
Rename the file to energi2_wallet.dump
2. Migrate Using Energi Nexus
Go to Energi Nexus to migrate Gen 2 NRG to Gen 3 NRG.
2.1. - Select the Gen2 Coin Migration from the navigation on the left.
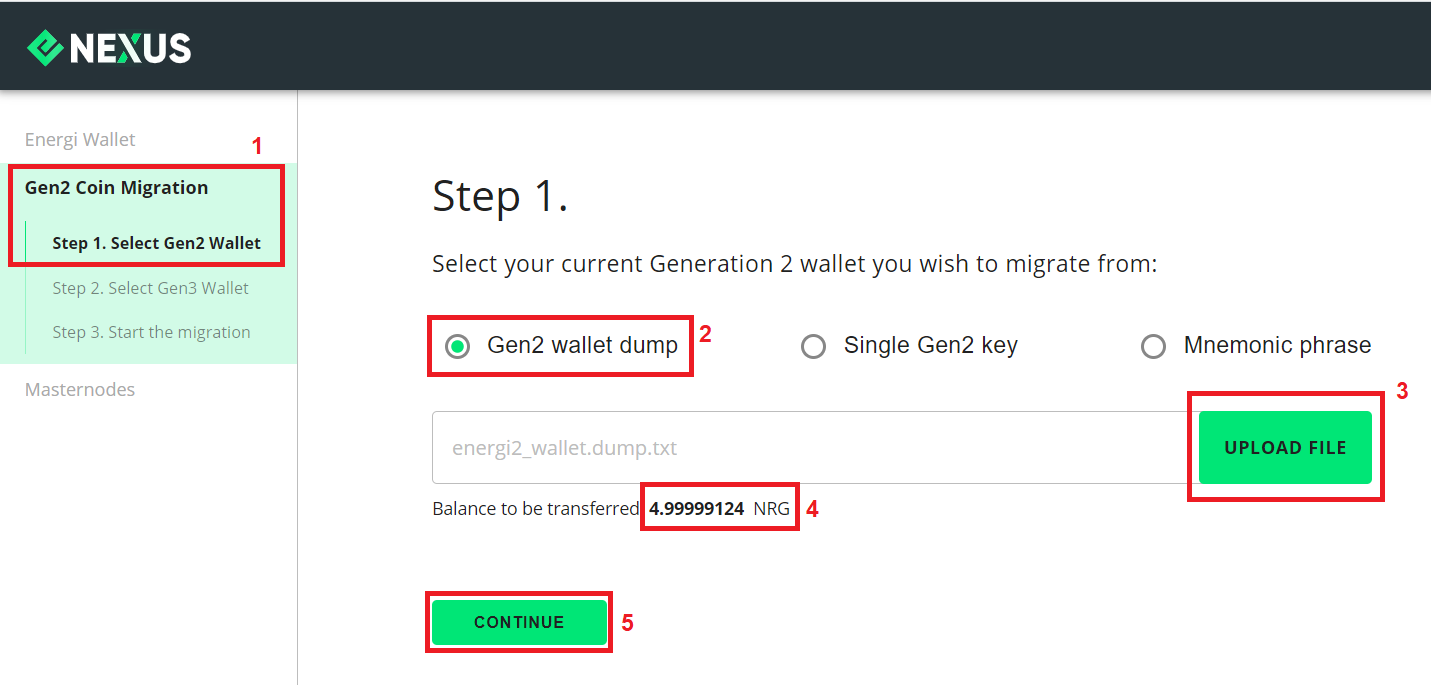
2.2. - Select Gen2 Wallet
2.2.1. - Pick Step 1. Select Gen2 Wallet
2.2.2. - Select Gen 2 Wallet Dump radio button.
2.2.3. - Click on UPLOAD FILE and select the dumpwallet file.
2.2.4. - Check the balance to be migrated matches your Gen 2 Core Wallet balance
2.2.5. - Click Continue.
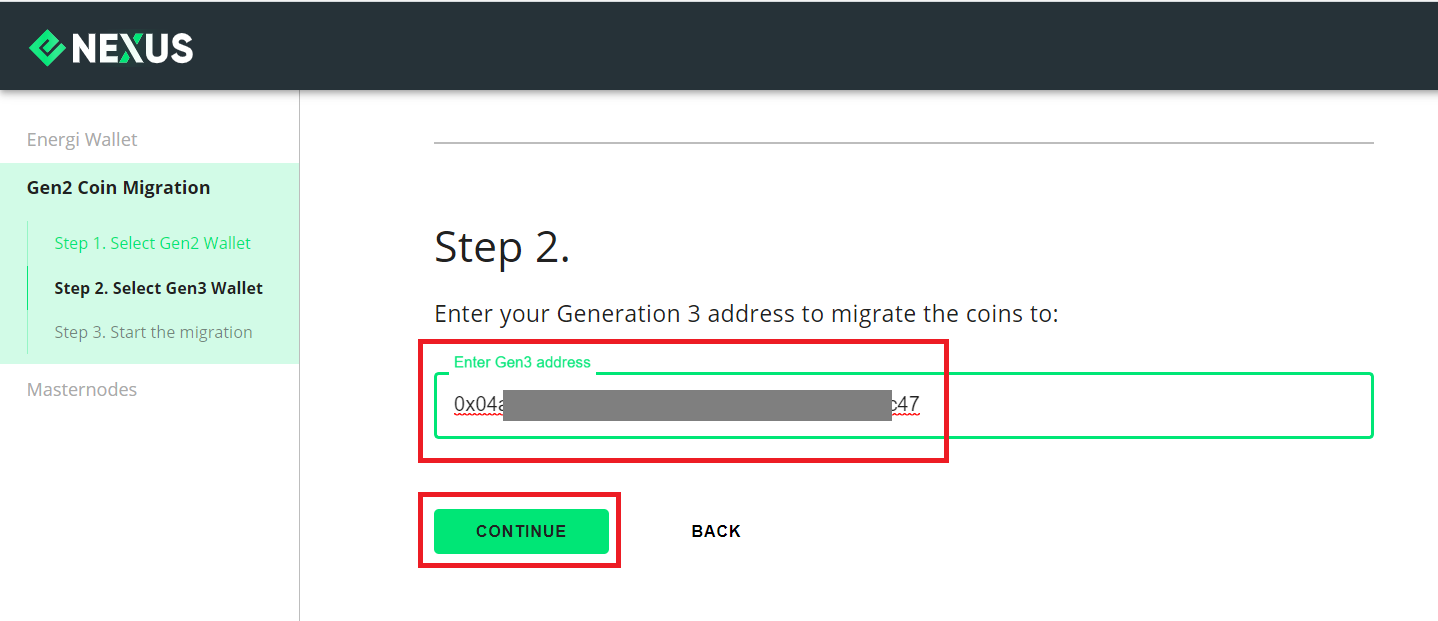
2.3. - Select Gen3 Wallet
Enter the Gen 3 Wallet address in the box and then click CONTINUE.
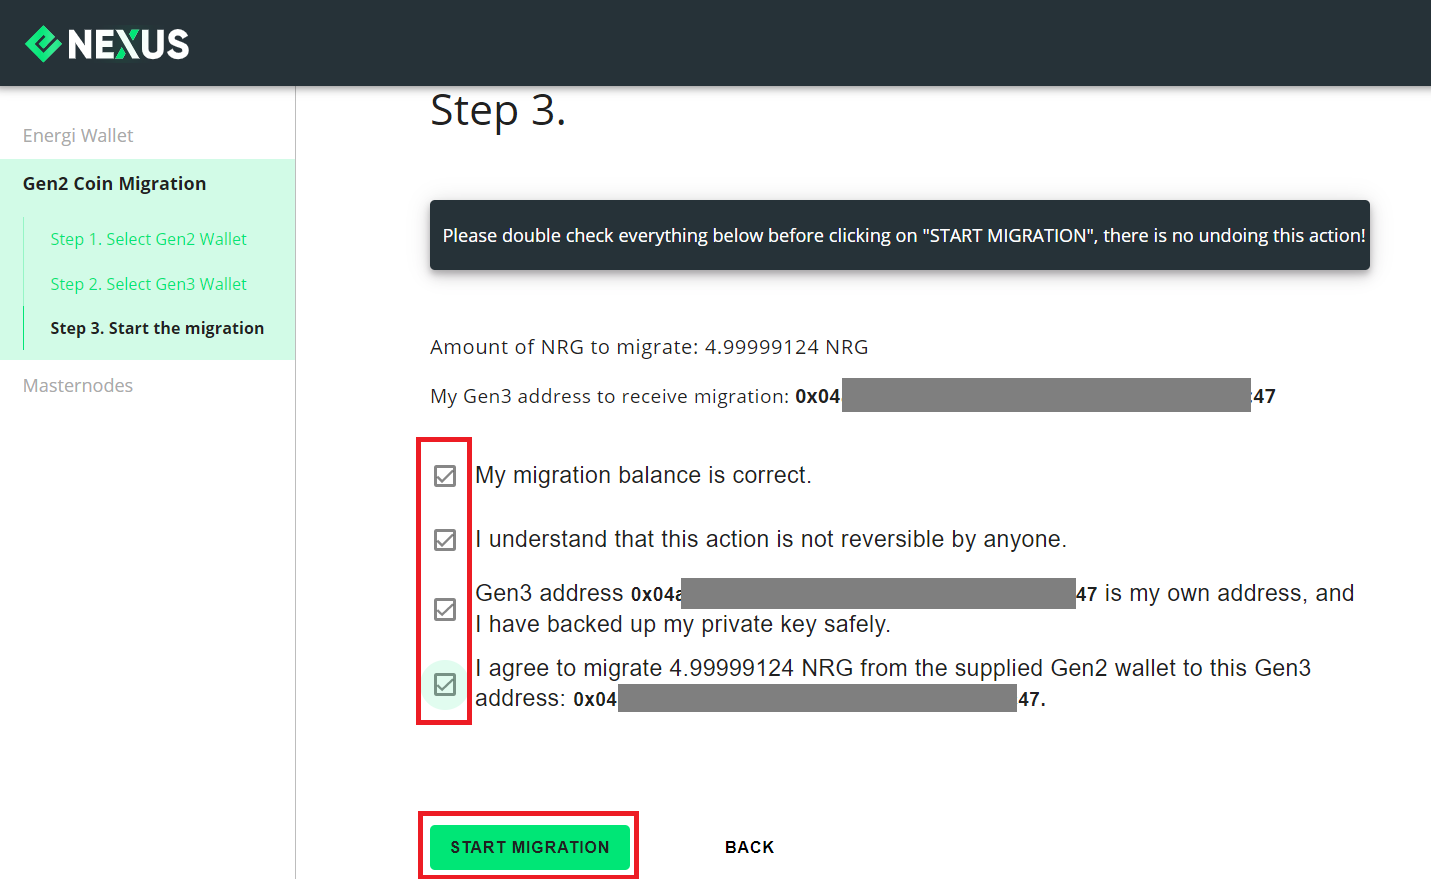
2.4. - Start Migration
In this step double check all the information and check off the list. Once you have verified everything is correct, click START MIGRATION.
You will get a message that the Gen 2 NRGs have successfully migrated to Gen 3.
Go to Energi Block Explorer to validate the transaction.
Congratulations! You have successfully completed the migration to Gen 3!